Creating your own cosmetic bag pattern is an exciting DIY project that combines functionality with personal style. Whether you’re a seasoned crafter or a beginner looking to organize your affordable cosmetic brands collection, a custom-made cosmetic bag offers the perfect solution for storing makeup, skincare products, and beauty essentials. This comprehensive guide walks you through every step of designing, measuring, and constructing a professional-quality cosmetic bag that reflects your unique aesthetic.
A well-designed cosmetic bag protects your valuable products from damage while keeping everything easily accessible. Unlike mass-produced options, a DIY cosmetic bag pattern allows you to choose fabric quality, interior organization, and dimensions tailored specifically to your needs. Whether you prefer a compact clutch for travel or a spacious organizer for your bathroom vanity, this tutorial provides all the expertise you need to bring your vision to life.
Understanding Cosmetic Bag Essentials
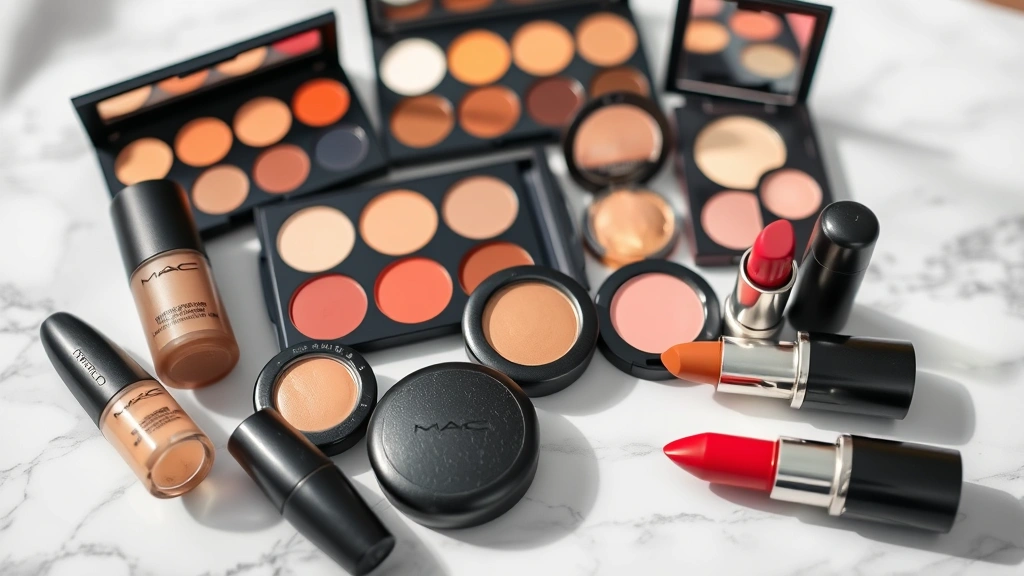
Before diving into your cosmetic bag pattern project, it’s important to understand what makes an effective storage solution for beauty products. The ideal cosmetic bag balances aesthetic appeal with practical functionality, protecting your top drugstore cosmetics and skincare items from moisture, heat, and physical damage. Consider how you’ll use your bag—daily bathroom storage, travel companion, or professional makeup artist kit—as this influences your design choices.
The interior structure significantly impacts usability. Pockets, dividers, and compartments prevent products from rolling around and getting lost. A waterproof or water-resistant lining protects your bag’s exterior from spills and leaks, especially important when storing liquid foundations, serums, and other liquid skincare products like hyaluronic acid serums. The closure mechanism—whether zipper, snap, or magnetic—determines how securely your products stay contained during transport.
Dimensions matter considerably when organizing beauty products. A standard cosmetic bag measures approximately 8-10 inches wide by 5-6 inches tall, accommodating most standard makeup items and skincare bottles. However, your personal collection might require different proportions. Measuring your most frequently used items ensures your custom pattern accommodates everything comfortably without excess bulk.
Materials and Tools You’ll Need
Gathering quality materials is essential for creating a professional-looking cosmetic bag. Your material choices directly impact durability, aesthetics, and functionality. Here’s a comprehensive breakdown of what you’ll need:
- Exterior Fabric: Choose durable, washable options like canvas, cotton twill, or heavyweight linen. These materials resist wear and tear from daily use. Consider fabric weight—12 ounces or heavier works best for structural integrity.
- Interior Lining: Waterproof or water-resistant fabrics are crucial. Laminated cotton, oilcloth, or PUL (polyurethane laminate) protect against spills from makeup, moisturizers, and niacinamide serums. These materials wipe clean easily and prevent product staining.
- Interfacing: Medium-weight fusible interfacing (20-25 grams) adds structure without excessive stiffness. This stabilizes your pattern pieces and prevents sagging.
- Zipper: An 8-12 inch metal or heavy-duty plastic zipper provides secure closure. Metal zippers offer better longevity for frequently used bags.
- Thread: Polyester or cotton-polyester blend thread in matching colors ensures strong seams. Upholstery thread adds extra durability for high-stress areas.
- Optional Embellishments: Bias tape, piping, elastic straps, or decorative patches personalize your design.
Essential tools include a rotary cutter and self-healing cutting mat for precise fabric cutting, a quilting ruler for accurate measurements, sharp fabric scissors, a seam ripper for corrections, pins or pattern weights, and a sewing machine with a heavy-duty needle (size 16-18). A serger machine is optional but creates professional-finished seams.
Creating Your Pattern Template
Designing your cosmetic bag pattern starts with accurate measurements and a clear template. Begin by deciding your bag’s final dimensions. For a standard cosmetic bag, measure approximately 9 inches wide by 5.5 inches tall by 3 inches deep. Add 0.5-inch seam allowances to all edges—this becomes crucial during construction.
Draft your pattern on kraft paper or use a pattern-making software program. Your basic pattern consists of:
- Main Body Pieces: Two identical rectangles representing the front and back panels
- Side Panels: Two strips that create depth and dimension
- Bottom Panel: One rectangular piece that forms the base
- Interior Pocket Pieces: Optional additions for organization
For a 9×5.5×3 inch finished bag, cut your main body pieces at 9.5 x 6 inches (accounting for seam allowance). Side panels measure 3.5 x 6 inches, and the bottom panel measures 9.5 x 3.5 inches. These measurements create a structured, boxy shape that maximizes interior space.
Test your pattern with muslin fabric first—this inexpensive cotton allows you to verify measurements and construction methods before cutting expensive materials. Make adjustments based on how the prototype functions. Does it hold your items comfortably? Are seams aligned properly? This testing phase prevents costly mistakes with final fabrics.
Fabric Selection and Preparation
Choosing the right fabrics determines your cosmetic bag’s longevity and appearance. For the exterior, select fabrics that complement your personal style while offering durability. Canvas provides a classic, structured look perfect for everyday use. Quilted cotton adds dimension and visual interest. Linen offers a sophisticated aesthetic, though it wrinkles slightly. Denim creates a casual, durable option ideal for travel bags.
Interior lining selection is equally critical. Waterproof fabrics protect your bag and its contents from moisture damage. Laminated cotton combines cotton’s softness with protective coating, making cleanup simple—just wipe with a damp cloth. PUL fabric offers similar benefits with added flexibility and stretch resistance. Oilcloth provides vintage appeal while delivering excellent water resistance.
Prepare your fabrics by pre-washing exterior materials according to fiber content. This prevents future shrinkage that could alter your bag’s fit. Waterproof linings typically don’t require washing, but check manufacturer instructions. Press all fabrics with a medium heat iron to remove wrinkles, ensuring accurate cutting and seaming.
Color coordination enhances your finished bag’s appeal. Choose complementary colors between exterior and lining, or create contrast for visual interest. Consider how your bag coordinates with your makeup collection and personal style. Neutral exteriors with patterned linings offer versatility, while bold exteriors make statements.

Cutting and Assembly Instructions
Precise cutting is fundamental to successful cosmetic bag construction. Using your pattern template, lay fabric pieces on a cutting surface. Secure with pattern weights or pins to prevent shifting. Cut carefully along edges using a rotary cutter and ruler or sharp scissors. Cut all exterior fabric pieces, interior lining pieces, and interfacing pieces according to your pattern.
Apply fusible interfacing to the wrong side of exterior fabric pieces following manufacturer instructions. This typically involves pressing with a hot iron for 10-15 seconds. Interfacing stabilizes fabric and prevents stretching during seaming.
Begin assembly by constructing the bag body:
- Pin the zipper: Position your zipper along the top edge of one main body piece, right sides together. The zipper tape should align with the fabric edge. Sew using a zipper foot attachment, stitching 0.5 inches from the edge.
- Attach the second main body piece: Place the second body piece right sides together with the first, sandwiching the zipper. Sew the opposite side of the zipper to this piece using the same technique.
- Construct the lining: Repeat the zipper attachment process with your interior lining pieces. Keep lining separate from the exterior at this stage.
- Attach side panels: Pin side panels to the main body pieces, right sides together. Sew along the side edges using a 0.5-inch seam allowance. Backstitch at the beginning and end for reinforcement.
- Attach the bottom panel: Pin the bottom panel to the lower edges of all four sides. Sew carefully, creating crisp corners. Reinforce corner seams with additional stitching for durability.
Insert the exterior bag inside the lining with right sides together. Align seams carefully. Sew around the remaining open edges, leaving a 3-inch opening for turning. Turn the bag right-side-out through this opening. Hand-stitch the opening closed using a ladder stitch for invisible seaming.
Adding Functional Features
Elevate your cosmetic bag’s functionality by incorporating organizational features. Interior pockets keep small items like lipstick, eyeliner, and makeup brushes easily accessible and organized. Cut pocket pieces from waterproof lining material, fold edges under, and stitch to the interior lining before assembling the bag.
Add elastic loops inside for securing brush handles or pen-style applicators. This prevents rolling and keeps items from shifting during transport. Space loops approximately 1 inch apart along one interior wall. Stitch securely, reinforcing each attachment point.
Consider adding a small zippered pocket for coins, keys, or jewelry. This separate compartment keeps miscellaneous items contained and prevents them from contacting your beauty products. Use a small metal zipper and follow the same attachment techniques as the main zipper.
Dividers create separate sections for different product categories. Cut firm interfacing or thin cardboard to fit interior dimensions, then wrap edges with waterproof fabric. Insert dividers vertically to create compartments for foundations, powders, brushes, and skincare items. This organization is especially useful if you store items like skincare products for maintaining skin health alongside makeup.
Add a carrying handle by stitching sturdy fabric strips or grosgrain ribbon to the interior top edges. This creates a convenient handle for easy transport. Ensure stitching is reinforced with box stitching—a square with an X through it—for maximum strength.
Finishing Touches and Customization
Personalize your cosmetic bag with decorative elements that reflect your style. Bias tape trim along the zipper opening adds professional polish and prevents fraying. Choose contrasting colors or patterns that coordinate with your fabric choices. Stitch bias tape carefully for a finished appearance.
Embroidery personalizes your bag with initials, names, or decorative designs. Use embroidery thread and appropriate needle sizes for your chosen design. Practice on scrap fabric first to perfect your technique. Machine embroidery offers quick results for complex designs, while hand embroidery provides a personal, artisanal touch.
Appliqué designs add visual interest and dimension. Cut shapes from contrasting fabric, press under the edges, and stitch to your bag’s exterior. This technique works beautifully for monograms, geometric patterns, or themed designs.
Consider adding a fabric label inside your bag with your name or a meaningful date. This personalization makes the bag a keepsake while ensuring identification if misplaced. Use a label maker or hand-write on fabric labels.
Exterior pockets provide additional storage and functionality. Patch pockets add a utilitarian aesthetic perfect for casual bags. Position pockets strategically and stitch securely, reinforcing corners for strength. Angled or curved pocket tops add visual interest while maintaining functionality.

Professional Techniques for Durability
Creating a cosmetic bag that lasts requires attention to construction details that enhance longevity. Double-stitching all seams reinforces stress points, particularly where the zipper attaches and where side panels meet the body. This extra reinforcement prevents seams from splitting under the weight of your products.
Backstitch at the beginning and end of every seam, locking threads in place. This prevents seams from unraveling during use. For particularly important seams like zipper attachments, backstitch multiple times or use a box stitch pattern.
Select heavy-duty thread for construction. Polyester thread offers excellent strength and color retention, while upholstery thread provides extra durability for high-stress areas. Match thread color to your fabric for invisible seams, or use contrasting thread for decorative effect.
Use a zipper foot attachment when sewing zipper seams. This specialized presser foot sits closer to the zipper, allowing precise stitching without catching zipper teeth. Practice on scrap fabric to perfect your technique before working on your actual bag.
Serge raw seams if you have access to a serger machine. This creates professional-finished edges that prevent fraying and add durability. Serged seams are particularly beneficial for interior seams where fraying could contact your products.
Test your finished bag’s functionality before declaring it complete. Fill it with your actual cosmetics and skincare products. Does the zipper glide smoothly? Do items fit comfortably? Can you access everything easily? Make adjustments as needed to optimize usability.
Protect your completed cosmetic bag with a fabric protectant spray. This water and stain-resistant treatment extends the life of your exterior fabric, making cleanup easier and preventing permanent staining. Apply according to product instructions and allow proper drying time before use.
FAQ
What’s the best fabric weight for a durable cosmetic bag?
Choose exterior fabrics weighing 12 ounces or heavier. Canvas, quilted cotton, and heavyweight linen provide excellent durability for daily use. Lighter fabrics may sag or tear under the weight of full cosmetic collections. Interior lining should be waterproof—laminated cotton or PUL works best.
Can I make a cosmetic bag without a sewing machine?
While a sewing machine significantly simplifies the process, hand-sewing is possible for small bags. Use a running stitch or backstitch for seams, taking small, even stitches. Hand-sewing requires more time and patience but produces satisfying results. Reinforce all seams with multiple passes for strength.
How do I prevent my waterproof lining from cracking?
Avoid folding your finished bag sharply or storing it in extreme temperatures. Waterproof fabrics can become brittle in cold or develop cracks with repeated creasing. Store your bag flat or loosely rolled. Gently unfold it before use to prevent stress on the lining.
What zipper length works best for cosmetic bags?
An 8-10 inch zipper accommodates most cosmetic bag designs. Measure your pattern’s top edge to determine the appropriate length. Longer zippers (12 inches) work for larger bags, while smaller bags need 6-8 inch zippers. Ensure your zipper measurement matches your pattern exactly.
Can I add interior pockets to a finished bag?
Yes, though it’s easier during initial construction. For finished bags, carefully open one interior seam using a seam ripper. Insert and stitch pockets, then hand-stitch the seam closed. This requires precision and patience but allows adding functionality to existing bags.
How should I clean my homemade cosmetic bag?
Wipe the exterior with a damp cloth and mild soap, then air dry. For waterproof linings, simply wipe clean with a damp cloth—no submersion needed. Avoid machine washing unless your exterior fabric is cotton and you’ve secured all embellishments. Check seams and zipper functionality regularly, addressing any issues promptly.