Leg Cosmetics: Expert Tips for Flawless Application
Leg cosmetics have revolutionized the way beauty enthusiasts approach lower body coverage, offering solutions that extend far beyond traditional foundation and concealer. Whether you’re preparing for a special event, managing skin imperfections, or simply wanting to enhance your natural complexion, understanding how to properly apply leg cosmetics is essential for achieving professional, long-lasting results. The legs present unique challenges compared to facial application—the skin texture differs significantly, movement and friction occur constantly, and environmental factors like sun exposure create specific needs.
This comprehensive guide explores everything you need to know about selecting, preparing, and applying leg cosmetics for flawless coverage. From choosing the right products for your skin type to mastering application techniques that withstand daily wear, we’ll cover the expert strategies that beauty professionals use to ensure your leg cosmetics look natural, blend seamlessly, and last throughout your day or special occasion.
Understanding Leg Skin Structure and Its Unique Needs
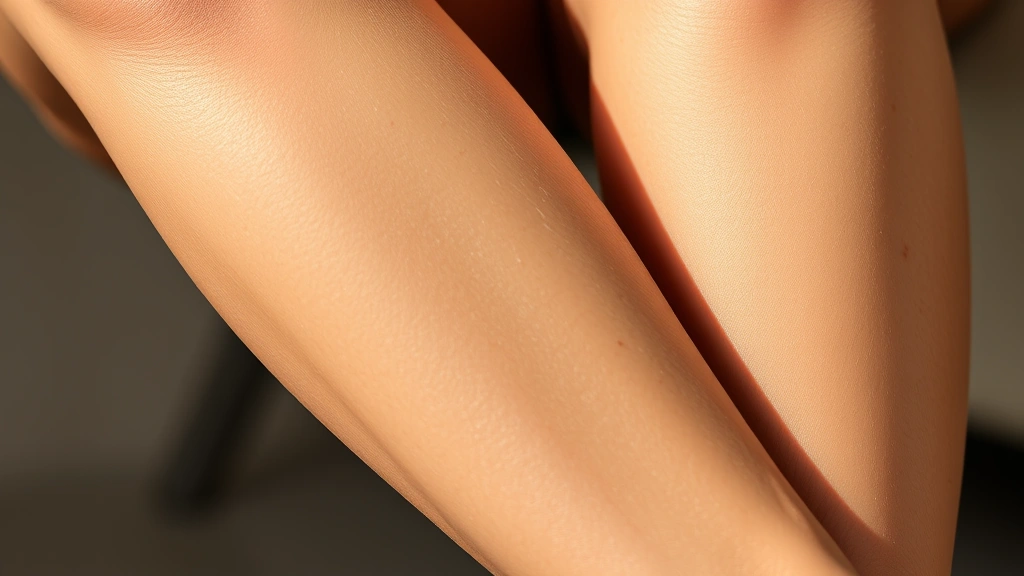
The skin on your legs differs substantially from facial skin in both structure and function. Leg skin contains fewer oil glands, making it naturally drier and more prone to dehydration. This characteristic means that leg cosmetics must be formulated differently than facial products—they need enhanced hydrating properties and better adherence to prevent flaking, pilling, or streaking. The dermis layer on legs is also thicker, which can affect how pigments appear and how products blend.
Additionally, legs experience constant friction from clothing, movement during walking, and exposure to environmental stressors. This means your chosen leg cosmetics must have superior staying power and flexibility. The lack of natural oils also means products won’t have the same self-regulating moisture balance that facial skin provides. Understanding these structural differences is crucial for selecting products that will perform optimally on this delicate area.
Leg skin also tends to be less sensitive than facial skin, allowing for slightly heavier formulations and more potent ingredients. However, this doesn’t mean you should ignore compatibility—everyone’s skin is different, and some individuals may experience irritation from certain cosmetic ingredients. If you’re managing existing skin conditions on your legs, consider reviewing our guide on how to treat contact dermatitis to ensure your cosmetics won’t aggravate sensitive areas.
Preparing Your Legs for Cosmetic Application
Proper preparation is the foundation of flawless leg cosmetic application. Begin by thoroughly cleansing your legs with a gentle body wash to remove dirt, oils, and dead skin cells. Pat your skin dry completely—moisture on the surface will prevent cosmetics from adhering properly. Many professionals recommend waiting 2-3 minutes after cleansing before applying products to allow your skin to fully dry.
Exfoliation is crucial for leg cosmetics success. Use a gentle chemical exfoliant (containing AHAs or BHAs) or a soft physical exfoliant 2-3 times weekly to remove dead skin buildup. This step ensures smoother application and prevents cosmetics from clinging to dry patches. For the best results, exfoliate the evening before your application day, allowing your skin to recover overnight.
Moisturization cannot be overstated. Apply a hydrating body lotion or cream to clean, damp legs, focusing on areas prone to dryness. Wait 5-10 minutes for the moisturizer to fully absorb before applying cosmetics. This creates an optimal base that allows products to blend seamlessly and wear evenly. Consider using a primer specifically designed for body cosmetics—these products create a smooth canvas and significantly improve longevity.
If you have specific concerns like texture irregularities or discoloration, you might benefit from our comprehensive skincare routine for glowing skin, which includes principles applicable to body skin preparation. Additionally, if you’re expecting or concerned about product safety, our resource on skincare products safe for pregnancy provides valuable guidance for expectant mothers.
Choosing the Right Leg Cosmetic Products
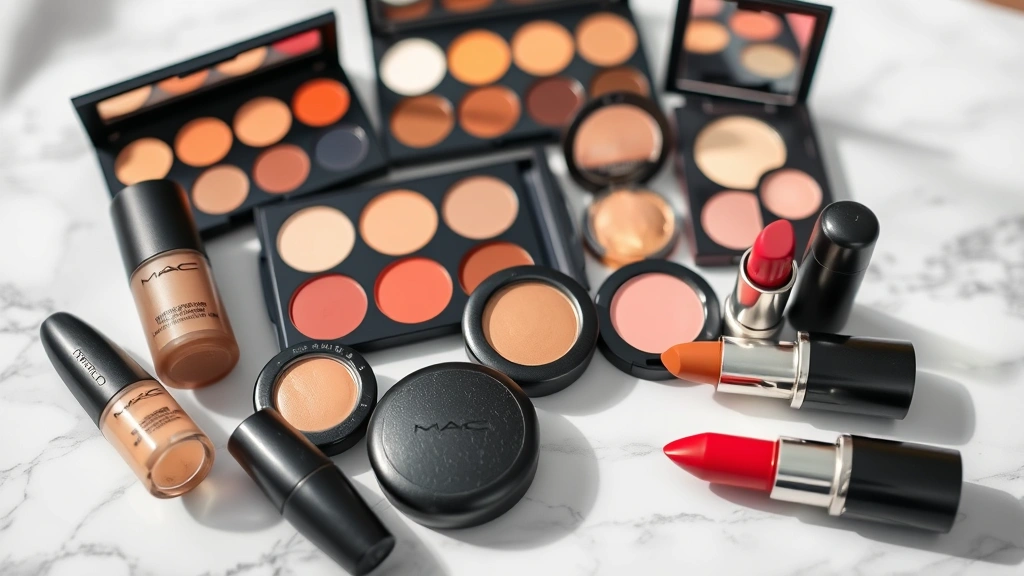
Selecting appropriate leg cosmetics requires understanding your specific needs and skin type. Leg foundations come in various formulations: liquid, cream, powder, and stick formats. Liquid foundations offer buildable coverage and blend easily, making them ideal for large surface areas. Cream formulations provide heavier coverage but require more blending time. Powder products work well for setting and touch-ups but may appear chalky on dry leg skin.
For dry leg skin, opt for hydrating formulas containing humectants like glycerin, hyaluronic acid, or propylene glycol. These ingredients draw moisture into the skin, preventing the tight, uncomfortable feeling that can accompany cosmetic application. Look for products labeled “moisturizing” or “hydrating” rather than matte finishes, which can emphasize dryness.
If your legs tend toward oiliness or combination skin, consider lightweight, breathable formulations that won’t feel heavy or sticky. Mattifying leg cosmetics often contain silicates or other oil-controlling ingredients. However, be cautious—overly matte products can still look unnatural on legs, so balance is key.
Undertone matching is equally important for leg cosmetics as it is for facial makeup. Your leg skin may have a different undertone than your face due to sun exposure and natural variation. Test products on your jawline or inner thigh—areas that better represent your natural leg tone. Look for products with warm, cool, or neutral undertones that match your specific skin.
Consider investing in quality brushes and tools designed for body application. Our detailed review of IT Cosmetics makeup brushes includes options suitable for body cosmetics application. Alternatively, many professionals recommend using damp beauty sponges or specialized body applicators for seamless blending on larger areas.
Key ingredients to seek in leg cosmetics include:
- Hyaluronic acid—holds up to 1000 times its weight in water, providing deep hydration
- Glycerin—a humectant that maintains skin moisture balance throughout wear
- Peptides—support skin firmness and elasticity for smoother appearance
- Niacinamide—strengthens skin barrier and reduces irritation
- Vitamin E—antioxidant protection and skin nourishment
- Silicones—create smooth texture and improve blending
- Dimethicone—provides slip and helps products glide across skin
Foundation and Base Application Techniques
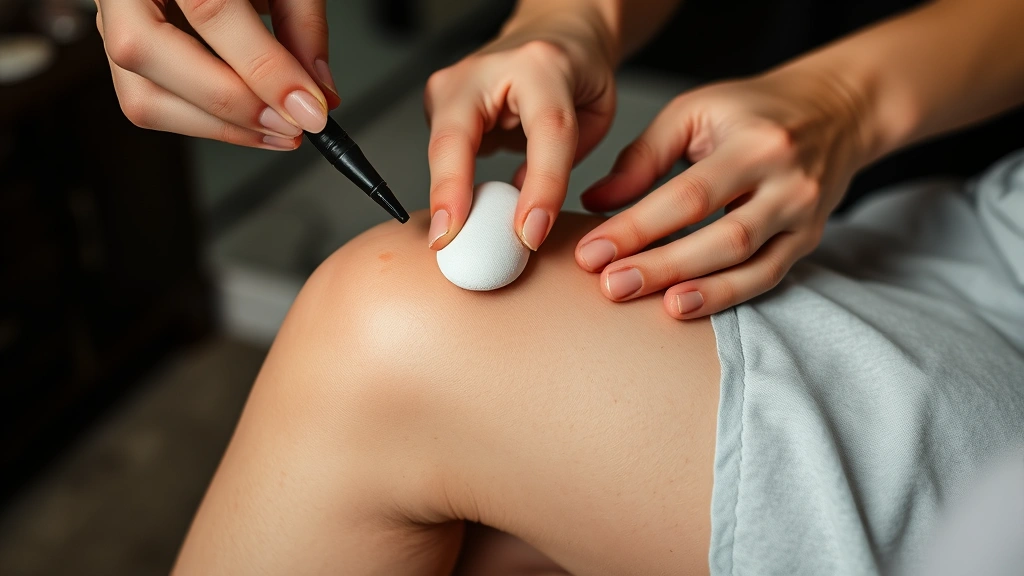
Applying leg cosmetics effectively requires specific techniques that differ from facial makeup application. Begin by dispensing a small amount of product onto the back of your hand or a palette. Using a damp beauty sponge or specialized body applicator, gently press the product into your skin rather than rubbing or dragging. This pressing motion ensures even distribution and prevents streaking.
Work in small sections, typically focusing on one leg at a time. Start at the ankle and work upward toward the thigh, following the natural contours of your leg. This direction promotes even coverage and prevents product from pooling in creases or behind the knee. Use light, feathering motions at the edges to ensure seamless blending with your natural skin.
For full coverage, apply cosmetics in thin layers rather than one thick application. Two to three thin layers provide better blending, more natural appearance, and superior longevity compared to a single heavy application. Allow each layer to set for 30-60 seconds before applying the next.
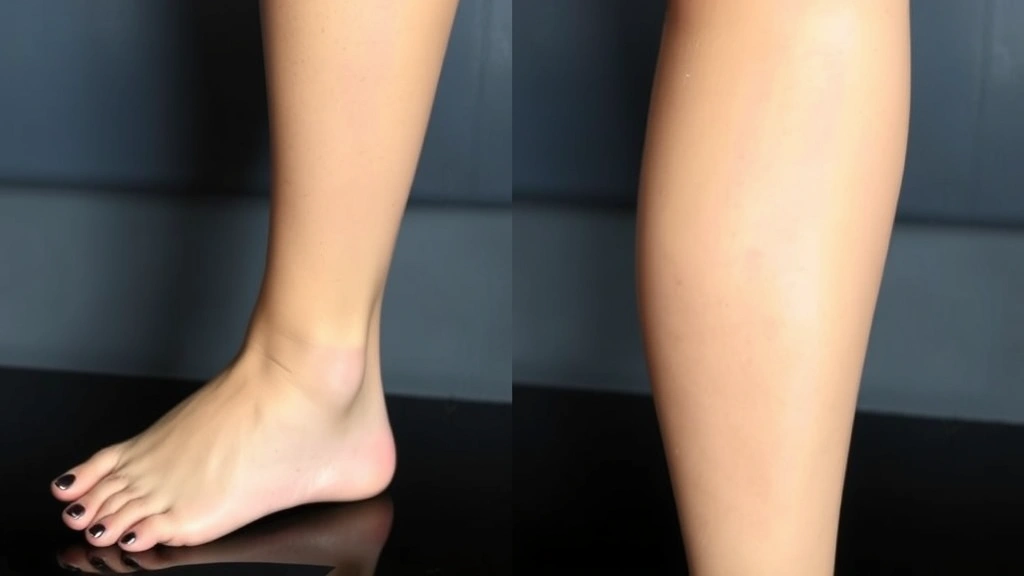
Pay special attention to problem areas: the inner thigh (which often has different pigmentation), behind the knee (where skin texture varies), and the top of the foot (if applying cosmetics there). These areas require extra blending time and may need additional moisturizing base product to achieve seamless results.
Consider using a primer designed for leg cosmetics before foundation application. These products create a smooth base, improve adherence, and extend wear time significantly. Apply primer to clean, moisturized legs and allow 1-2 minutes for absorption before applying foundation.
Concealing Imperfections on Legs
After applying your base leg cosmetics, address specific imperfections using targeted concealing techniques. Spider veins, bruises, scars, and hyperpigmentation require different approaches for optimal coverage.
For spider veins and visible veins: Use a concealer with green or yellow undertones to neutralize the blue-purple appearance. Apply with a thin brush or applicator, gently patting rather than rubbing. Set immediately with powder to prevent movement.
For bruises and discoloration: Start with a color corrector—yellow correctors work for purple tones, while peach or orange correctors neutralize blue undertones. Layer concealer over the corrector, building coverage gradually. Blend edges carefully to prevent visible demarcation lines.
For scars and texture irregularities: Apply a primer or smoothing product to the area first, filling in any depressions. Layer concealer and foundation, using a damp sponge to blend thoroughly. Texture-focused primers containing silicone or light-reflecting particles work exceptionally well for this purpose.
For hyperpigmentation and dark spots: Use a concealer one to two shades lighter than your foundation, applying only to the affected area. Pat gently with a sponge to blend edges. Consider using a brightening concealer formula containing light-reflecting particles for enhanced coverage.
Always match your concealer undertone to your leg cosmetics base for seamless integration. A concealer that’s too yellow, pink, or orange will create visible patches. Test on your inner thigh before full application to ensure compatibility.
Setting and Longevity Tips
Setting leg cosmetics properly is essential for all-day wear. After completing your application, wait 2-3 minutes for products to fully set before applying powder. Using setting powder too early can disturb your base and create patchiness.
Choose a finely-milled setting powder that matches your skin tone—white or translucent powders can appear chalky on legs. Apply powder using a large, fluffy brush with gentle pressing motions, not sweeping motions. Focus on areas prone to movement and friction: behind the knees, inner thighs, and where clothing contacts your skin.
For extended wear, consider using a setting spray after powder application. These products contain polymers that lock cosmetics in place and provide a natural-looking finish. Allow the spray to dry completely (usually 2-3 minutes) before dressing or sitting down.
Throughout the day, carry blotting papers designed for body cosmetics rather than facial products. These remove excess oil without disrupting your application. For touch-ups, use a cream concealer rather than reapplying foundation—this prevents buildup and maintains a natural appearance.
Environmental factors affect longevity significantly. Heat and humidity cause cosmetics to break down faster, while sun exposure can alter color appearance. If spending time outdoors, reapply sunscreen over your leg cosmetics using a powder formulation to maintain coverage.
Advanced Techniques for Specific Concerns
Beyond basic coverage, advanced leg cosmetic techniques address specific aesthetic goals. Contouring on legs follows similar principles to facial contouring but requires adaptation for the larger surface area and curved contours.
Leg contouring: Use a slightly darker foundation shade or bronzer along the outer thighs and sides of calves to create definition and slimming effects. Apply in vertical lines, blending thoroughly. Highlight the inner thighs and front of shins with a lighter, shimmery product to create lifting and elongating effects. This technique works particularly well for those wearing shorts or skirts.
Vein coverage for specific events: For occasions requiring flawless leg appearance, use full-coverage, long-wear formulations combined with strategic color correction. Many professionals layer products: primer, color corrector, full-coverage foundation, concealer, and setting powder for maximum durability. This approach requires practice but yields exceptional results.
Self-tanning preparation: If planning to apply self-tanning products, ensure your leg cosmetics are completely removed first. Self-tanning products interact poorly with cosmetic formulations and can cause streaking or uneven color. Apply self-tanner, allow full development (typically 6-8 hours), then apply leg cosmetics as desired.
Glowing skin effects: For a luminous appearance, incorporate subtle highlighting into your leg cosmetics routine. Apply a liquid or cream highlighter to the inner thighs, tops of calves, and shin areas. This creates dimension and a healthy, radiant look. Our guide on achieving glowing skin includes principles applicable to creating radiant leg appearance.
Age-specific considerations: Younger skin may benefit from lighter, more natural-looking leg cosmetics that enhance rather than conceal. As skin matures, fuller coverage and hydrating formulations become increasingly important. For teenagers beginning to explore leg cosmetics, our resource on skincare routine for teenagers provides foundational knowledge for healthy skin preparation.
Building collagen and improving skin quality over time enhances leg cosmetics results. When skin has better elasticity and firmness, cosmetics blend more seamlessly and last longer. Consider incorporating our strategies for boosting collagen production naturally into your long-term skincare regimen.
Removal and Aftercare
Proper removal of leg cosmetics is just as important as application. Never leave leg cosmetics on overnight—they can clog pores, trap bacteria, and cause irritation. Begin by using a makeup remover or cleansing oil, gently massaging your legs to dissolve the cosmetic products.
Follow with a gentle body wash and lukewarm water, thoroughly rinsing until no product residue remains. Pay special attention to areas behind the knees and between the toes if you’ve applied cosmetics there. Pat skin dry and immediately apply a hydrating body lotion or cream.
After removing leg cosmetics, assess your skin for any irritation or dryness. If you notice redness, itching, or burning sensations, discontinue use of that product and consult a dermatologist. Some individuals may experience delayed reactions to specific ingredients—keep detailed notes about which products you use for future reference.
Incorporate a nourishing body treatment into your post-cosmetics routine 2-3 times weekly. Use rich body creams or oils containing ceramides, plant oils, or peptides to restore moisture and support skin barrier health. This maintains the smooth, hydrated foundation necessary for flawless future applications.
Store your leg cosmetics properly to maintain their integrity. Keep products in a cool, dry location away from direct sunlight. Most formulations last 6-12 months after opening, though some may separate or change consistency over time. When in doubt, replace products rather than risk applying expired cosmetics that may have altered safety or performance profiles.
FAQ
What’s the best leg cosmetics product for sensitive skin?
Look for hypoallergenic formulations specifically labeled for sensitive skin, containing minimal fragrance and no common irritants like essential oils or alcohol. Brands focusing on dermatological formulations often provide better results for sensitive individuals. Patch test any new product on your inner thigh 24-48 hours before full application.
Can I use facial foundation on my legs?
While you can technically use facial foundation on legs, it’s not ideal. Facial products are formulated for different skin characteristics and may not provide adequate coverage or longevity on leg skin. Leg-specific cosmetics are designed with the unique needs of body skin in mind, offering better performance and more natural results.
How long do leg cosmetics typically last?
With proper application and setting techniques, quality leg cosmetics can last 8-12 hours or longer. Factors affecting longevity include product quality, your skin type, environmental conditions, and activity level. Using a primer and setting spray can extend wear time significantly.
Are there waterproof leg cosmetics options?
Yes, many brands offer waterproof leg cosmetics specifically formulated to withstand water exposure, sweat, and humidity. These products typically contain water-resistant polymers and require oil-based or specialized removers for complete removal.
Can leg cosmetics cause acne or breakouts?
While leg skin is less prone to acne than facial skin, some individuals may experience irritation or folliculitis from certain products. If you notice bumps or irritation, discontinue use and allow your skin to recover. Ensure you’re removing products thoroughly each evening and maintaining good hygiene.
What’s the difference between body foundation and leg cosmetics?
Body foundation typically covers larger areas and is formulated for overall body coverage, while leg-specific cosmetics are tailored to leg skin’s particular characteristics. Leg cosmetics often have enhanced staying power for areas experiencing constant movement and friction.
Should I apply sunscreen under leg cosmetics?
Yes, applying broad-spectrum SPF 30+ sunscreen before leg cosmetics provides essential protection, especially if you’ll be outdoors. Allow sunscreen to fully absorb before applying cosmetics. If reapplying sunscreen throughout the day, use a powder formulation to maintain your cosmetics application.