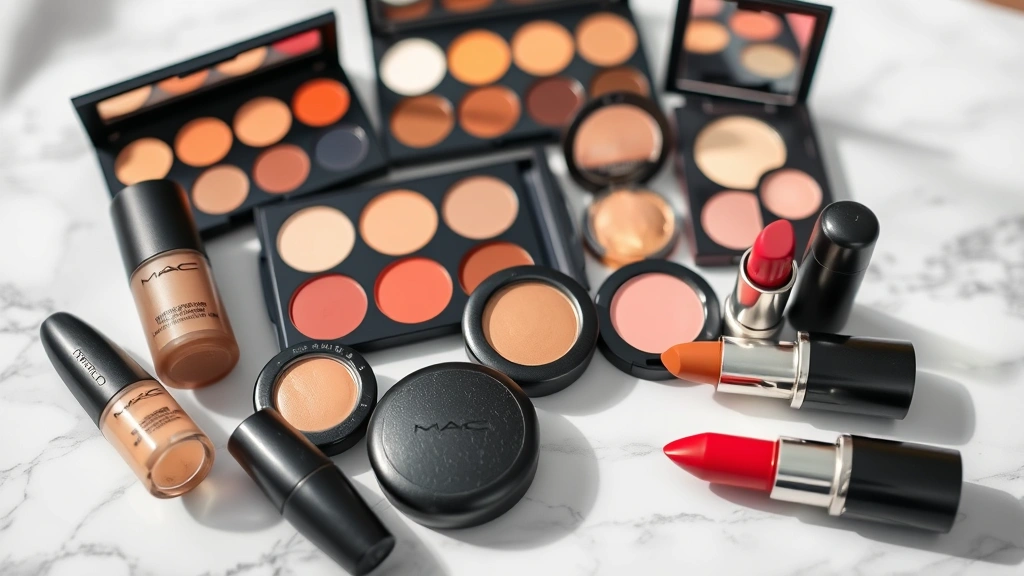
Cosmetic wedges are one of the most underrated tools in both professional makeup artistry and personal beauty routines. These simple triangular sponges have revolutionized how makeup artists apply foundation, powder, and concealer with precision and minimal product waste. Whether you’re a seasoned makeup professional or someone looking to elevate your daily beauty routine, understanding the proper techniques and applications of cosmetic wedges can dramatically improve your makeup application and final results.
The beauty of cosmetic wedges lies in their versatility and accessibility. Unlike brushes that require extensive cleaning and maintenance, wedges are affordable, disposable, and designed to reach angles and contours that traditional brushes sometimes miss. Professional makeup artists have long recognized that the right tool makes all the difference between a good makeup application and a flawless, camera-ready finish. This comprehensive guide explores everything you need to know about cosmetic wedges, from selection and preparation to advanced application techniques used by industry professionals.
What Are Cosmetic Wedges and Why They Matter
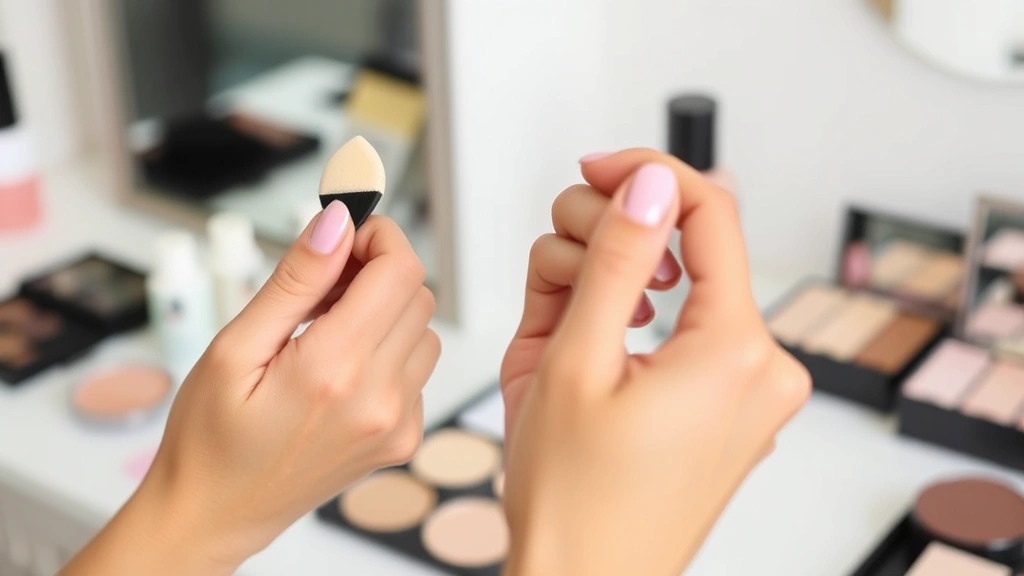
Cosmetic wedges, also known as makeup sponges or beauty wedges, are small triangular or teardrop-shaped applicators made from compressed foam or latex-free materials. These tools have become essential in professional makeup kits because they offer superior control, precision, and product efficiency compared to fingers or traditional brushes. The unique shape of cosmetic wedges provides multiple application surfaces—the pointed tip for detailed work, the flat edge for broad coverage, and the curved sides for blending seamlessly into contours.
The primary advantage of cosmetic wedges is their ability to stipple product onto the skin rather than dragging or sweeping it across. This stippling motion ensures better adhesion to the skin, more even coverage, and a longer-lasting finish. Professional makeup artists prefer wedges because they minimize product waste, create a seamless base, and allow for quick transitions between different makeup products. Unlike brushes that can leave streaks or uneven application, wedges distribute product evenly across the skin surface.
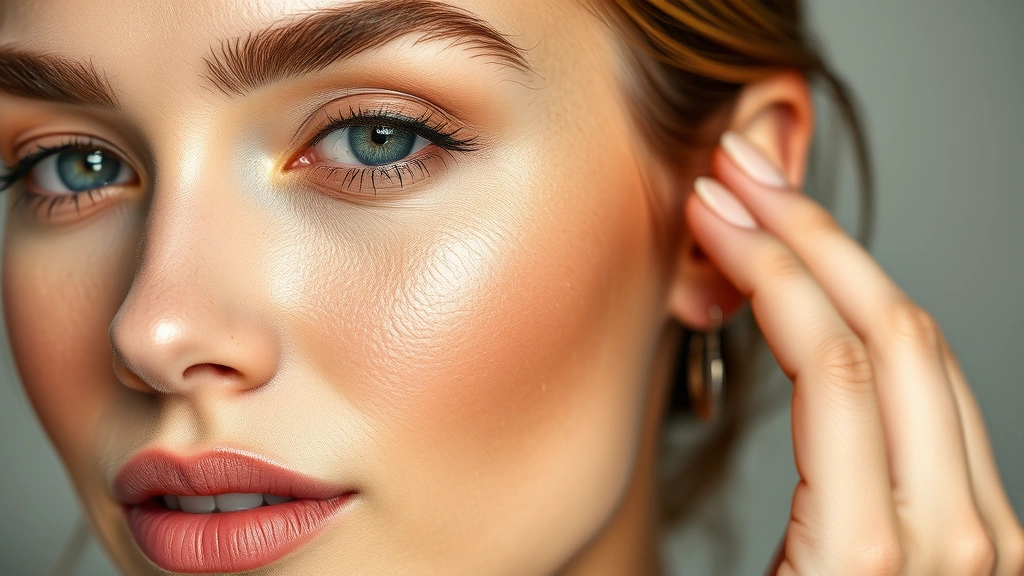
When you incorporate cosmetic wedges into your makeup routine alongside a proper skincare routine for glowing skin, you’ll notice that your makeup applies more smoothly and lasts longer throughout the day. This is because wedges work best on well-prepared, hydrated skin. The combination of proper skincare and the right application tools creates the ideal canvas for flawless makeup application.
Types of Cosmetic Wedges Available
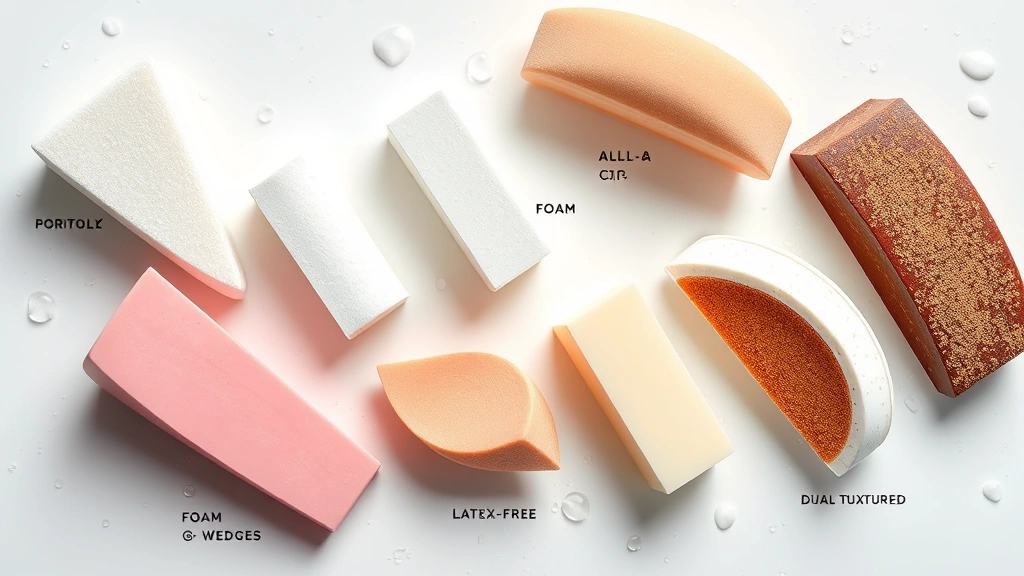
Not all cosmetic wedges are created equal. The market offers several varieties, each with specific benefits and ideal use cases. Understanding the differences helps you choose the right wedge for your particular needs and skin type.
Standard Foam Wedges: These are the most common and affordable option. Made from compressed foam, they’re durable, reusable, and excellent for all makeup applications. Standard foam wedges work well for most skin types and are particularly effective for stippling foundation and powder products.
Latex-Free Sponges: For individuals with latex sensitivities or allergies, latex-free cosmetic wedges offer the same performance without the risk of allergic reactions. These are typically made from synthetic foam materials that are hypoallergenic and suitable for sensitive skin.
Dual-Textured Wedges: Some advanced cosmetic wedges feature different textures on different sides—a finer texture for precise work and a coarser texture for blending. These versatile tools reduce the need to switch between multiple applicators during makeup application.
Silicone Wedges: Less common but increasingly popular, silicone cosmetic wedges don’t absorb product, making them economical for frequent users. They’re also easier to clean and sanitize, making them ideal for professional makeup artists who work with multiple clients daily.
Micro-Foam Wedges: These ultra-fine wedges are designed for detailed work and precision application. The tighter foam structure allows for more controlled product application, particularly useful for concealing blemishes or applying eyeshadow primers.
Foundation Application Techniques
Foundation application is where cosmetic wedges truly shine. The stippling technique used with wedges creates a base that’s both full-coverage and natural-looking, avoiding the heavy or cakey appearance that can result from brush or finger application.
The Stippling Method: Begin by applying small dots of foundation across your face using a pump or applicator brush. Then, using your damp cosmetic wedge, gently press the product into the skin using a bouncing, stippling motion rather than dragging or rubbing. Work systematically across the face—forehead, cheeks, nose, and chin. This technique ensures even distribution and prevents product buildup in certain areas.
Blending and Feathering: After initial application, use a clean or slightly damp wedge to blend the foundation edges, particularly around the jawline and hairline. The angled edge of the wedge is perfect for feathering product seamlessly into these transition areas. Professional makeup artists emphasize the importance of feathering to avoid visible foundation lines.
Building Coverage: Instead of applying heavy foundation in one pass, cosmetic wedges allow you to build coverage gradually. Apply a thin layer, blend it thoroughly, and add additional layers only where needed. This approach creates a more natural finish while maintaining full coverage where required. This technique works exceptionally well when your skin has been prepared with hydrating serums like hyaluronic acid, which creates a smooth surface for flawless application.
Underpainting Technique: Advanced makeup artists often use cosmetic wedges for underpainting, where foundation is applied in strategic areas to enhance facial features. The pointed tip of the wedge allows precise application along the nose bridge, under cheekbones, and around the eye area before overall foundation application.
Powder and Setting Techniques
Once foundation is applied and blended, setting powder is crucial for longevity and a polished finish. Cosmetic wedges are equally effective for powder application as they are for foundation, offering controlled product distribution that prevents the heavy, powdery appearance sometimes associated with brush application.
Light Setting Method: For a natural finish, lightly press a powder-loaded cosmetic wedge onto areas prone to oiliness—typically the T-zone and chin. The key is using minimal product and allowing the wedge to absorb excess oil naturally. This method prevents the powder from accumulating in fine lines or pores, which is a common problem with over-application.
Baking Technique: Professional makeup artists frequently use the baking technique with cosmetic wedges, particularly for special occasions or photography-heavy events. Apply a generous amount of setting powder to your T-zone, under eyes, and chin using a damp cosmetic wedge. Leave the powder on the skin for 5-10 minutes, allowing it to absorb excess moisture and set the makeup firmly. Then, using a clean, dry wedge, gently brush away excess powder. This technique provides exceptional longevity and a smooth, matte finish.
Targeted Setting: Different areas of the face may require different setting approaches. Use cosmetic wedges to apply translucent powder more heavily to areas that tend to get oily, while using minimal powder in areas prone to dryness. The precision of wedges makes this selective application easier than with larger brushes.
Concealer and Highlighting Applications
The precision offered by cosmetic wedges makes them ideal for concealer application, particularly for detailed work around the eyes and for covering specific blemishes or imperfections.
Under-Eye Concealing: The pointed tip of a cosmetic wedge is perfect for applying concealer to the delicate under-eye area. Apply concealer in a triangular pattern beneath the eye, then use the wedge to stipple and blend it seamlessly into the surrounding skin. The gentle stippling motion is less likely to cause tugging or irritation compared to finger application or brush work.
Blemish Coverage: For spot concealing, use the pointed end of your cosmetic wedge to apply concealer directly to blemishes or dark spots. The small surface area allows precise coverage without affecting surrounding skin. This is particularly important when dealing with active acne, where you want to minimize product contact with the entire area.
Highlighting and Brightening: Beyond traditional concealer, cosmetic wedges work wonderfully for applying liquid or cream highlighters. The stippling motion ensures even distribution of these reflective products, creating a natural glow rather than obvious streaks. Apply highlighter to the high points of the face—cheekbones, brow bones, bridge of nose—using gentle stippling motions with your wedge. For more information on enhancing your natural glow, explore our guide on quality highlighter products.
Correcting Discoloration: Color-correcting products applied with cosmetic wedges can neutralize redness, darkness, or yellowing before concealer application. The precision of wedges allows you to apply these specialized products exactly where needed without affecting larger areas of the face.
Contouring and Blending Methods
Contouring has become a cornerstone of modern makeup artistry, and cosmetic wedges are essential tools for achieving seamless, professional-looking contour blending.
Cream Contour Application: For cream contour products, apply the product using a cosmetic wedge in the areas where you want to add dimension—typically the hollows of cheeks, sides of the nose, temples, and jawline. The stippling motion of the wedge ensures the product blends seamlessly with your foundation rather than sitting on top of the skin.
Powder Contour Blending: Powder contour products require careful blending to avoid harsh lines. Use a clean cosmetic wedge to blend powder contour products by gently stippling and sweeping along the contour area. The edge of the wedge allows you to create soft, diffused lines that look naturally sculpted rather than obviously applied.
Transition Blending: One of the most critical aspects of successful contouring is creating smooth transitions between contour and foundation. Use a clean or very lightly product-loaded cosmetic wedge to blend where contour meets foundation. This blending step is what separates amateur contouring from professional results.
Layering Technique: Professional makeup artists often layer contour products—applying cream contour first, then setting with powder contour, then blending with additional light layers. Cosmetic wedges are perfect for this multi-step process because they allow precise control at each stage.
Cleaning and Hygiene Practices
Proper cleaning and maintenance of cosmetic wedges is essential for both hygiene and product longevity. Dirty wedges can harbor bacteria, leading to breakouts and skin irritation, particularly around sensitive areas like the under-eye zone.
Daily Cleaning: After each use, rinse your cosmetic wedge under warm running water to remove excess makeup product. Gently squeeze the wedge to release trapped product. For more thorough daily cleaning, use a gentle cleanser or makeup remover to wash the wedge thoroughly, then rinse until water runs clear.
Deep Cleaning: At least once weekly, deep clean your reusable cosmetic wedges. Place them in a small bowl with warm water and a gentle facial cleanser or specialized sponge cleaner. Let them soak for 5-10 minutes, then gently squeeze the cleaner through the wedge. Rinse thoroughly under running water until completely clean. Some professionals use a mixture of water and a few drops of tea tree oil for its antimicrobial properties.
Drying and Storage: After cleaning, gently squeeze out excess water (don’t wring or twist, as this can damage the foam structure). Place wedges on a clean paper towel or cloth to air dry completely before storing. Store in a clean, dry container away from moisture and heat. Never store damp wedges, as this promotes bacterial growth and mold.
Replacement Schedule: Even with proper care, cosmetic wedges eventually deteriorate. Replace wedges every 2-3 months for regular users, or sooner if they show signs of falling apart, discoloration, or damage. Professional makeup artists often replace wedges more frequently due to heavy use and the need to maintain the highest hygiene standards.
Sanitization for Professionals: If you’re a makeup artist working with multiple clients, sanitize wedges between uses. Use a professional-grade sanitizing spray or place wedges in a UV sanitizer designed for beauty tools. Never reuse a wedge with a different client without proper sanitization.
Pro Tips from Makeup Artists
Professional makeup artists have developed numerous techniques and tricks over years of practice. Here are some insider tips that can elevate your cosmetic wedge application:
Dampening for Seamless Blending: Slightly dampen your cosmetic wedge with setting spray or plain water before blending. A damp wedge creates smoother blending, prevents product disruption of already-applied makeup, and helps the wedge glide more smoothly across the skin. This is particularly useful when blending foundation edges or softening contour lines.
Temperature Control: Some professional makeup artists refrigerate their cosmetic wedges before use. A cool wedge can help reduce puffiness, particularly under the eyes, while the coolness also helps set makeup and creates a smoother application. This technique is especially popular for bridal makeup and special event applications.
Product Loading Technique: Rather than saturating your wedge with product, use a light touch. Load just enough product onto the wedge to complete one section of the face, then reload as needed. This approach prevents product waste and allows better control over coverage intensity.
Angled Application: Don’t always use the wedge straight-on. Angle it at different degrees to access different facial contours. The pointed tip works for detailed areas, the flat edge for broader coverage, and the sides for blending along jawlines and temples. Professional makeup artists rotate and angle their wedges constantly throughout application.
Wedge-Only Application: Some advanced makeup artists apply their entire face using only cosmetic wedges, forgoing brushes entirely. This approach requires skill and practice but offers exceptional consistency and control. If you’re interested in refining your technique further, understanding facial massage techniques can complement your makeup application by improving skin texture and blood flow.
Combination with Skincare: Professional makeup artists emphasize that cosmetic wedges work best on properly prepared skin. Understanding how to boost collagen production naturally and maintain optimal skin health ensures your foundation has the best possible base for application.
Product Selection Matters: Different products work better with cosmetic wedges than others. Silicone-based foundations and powders apply beautifully with wedges, while very thick or pigmented products may require different approaches. Experiment with your specific products to determine the optimal application method.
Pressure Control: The amount of pressure you apply with your cosmetic wedge significantly affects the final result. Light pressure creates sheer, natural coverage, while moderate pressure builds coverage without looking heavy. Excessive pressure can disrupt underlying products or create an unnatural finish. Professional makeup artists develop an intuitive sense of appropriate pressure through practice.
FAQ
Can I use the same cosmetic wedge for different products?
Yes, you can use the same cosmetic wedge for multiple products within a single makeup application, as long as you’re working from light to dark products. However, for hygiene reasons, it’s best to use separate wedges if applying products to different clients or if you want to prevent color mixing in your wedge.
Are cosmetic wedges suitable for sensitive skin?
Absolutely. In fact, cosmetic wedges are often recommended for sensitive skin because the gentle stippling motion is less irritating than brushes or finger application. Ensure you’re using latex-free wedges if you have latex sensitivity, and always clean your wedges thoroughly to prevent bacteria accumulation that could irritate sensitive skin.
How many cosmetic wedges do I need?
For personal use, 5-10 cosmetic wedges are typically sufficient, allowing you to use a clean wedge for each makeup application while having time for washing and drying. Professional makeup artists often maintain larger collections—20-30 or more—to ensure they always have clean, dry wedges available between client appointments.
Can cosmetic wedges be used with powder products only?
While cosmetic wedges excel with powder products, they’re equally effective with liquid, cream, and gel formulations. The key is matching the dampness of your wedge to the product type—use drier wedges for powders and slightly damp wedges for liquid or cream products for optimal blending.
Do expensive cosmetic wedges perform better than budget options?
Higher-priced cosmetic wedges often feature better quality foam, superior durability, and sometimes innovative designs. However, standard budget wedges work effectively for most applications. If you’re just starting with cosmetic wedges, budget options are perfectly adequate. As you develop your technique, you might experiment with premium options to see if they offer benefits that justify the cost for your specific needs.
Can I use cosmetic wedges for eyeshadow application?
Yes, cosmetic wedges can be used for eyeshadow application, particularly for blending and diffusing eyeshadow colors. However, the small, detailed nature of eye makeup often makes dedicated eyeshadow brushes more practical. Some makeup artists use the pointed tip of a cosmetic wedge for eyeshadow primer application or for blending shadow into the crease.
External Resources: