Keeping your makeup brushes clean is essential for flawless application and healthy skin. Dirty brushes harbor bacteria, fungi, and product buildup that can cause breakouts, uneven coverage, and bristle damage. While professional brush cleaners exist, a DIY cosmetic brush cleaner can be just as effective—and significantly more affordable. In this comprehensive guide, we’ll explore expert-approved methods, ingredient combinations, and maintenance routines that will keep your brushes in pristine condition.
Whether you’re a makeup artist, beauty enthusiast, or casual user, understanding how to properly clean your brushes extends their lifespan and ensures optimal performance. The right cleaning solution removes stubborn makeup residue, conditions bristles, and prevents bacterial growth without damaging delicate fibers. Let’s dive into the science-backed strategies that professional makeup artists and dermatologists recommend.
Why Clean Brushes Matter for Skin Health
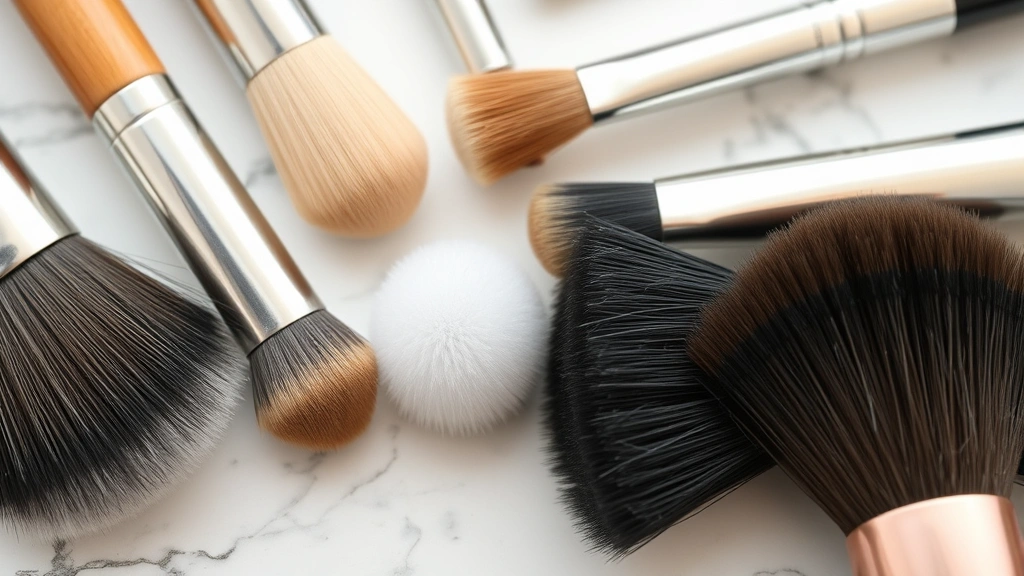
Your makeup brushes are direct contact tools that touch your face multiple times daily. Over time, they accumulate dead skin cells, sebum, bacteria like Staphylococcus aureus, and product residue. This buildup creates an ideal environment for acne-causing organisms, especially if you have sensitive skin prone to breakouts. According to research from the American Academy of Dermatology, unclean brushes significantly increase the risk of bacterial infections and inflammatory skin conditions.
Beyond acne, dirty brushes cause uneven makeup application, color streaking, and bristle deterioration. Natural hair bristles (like sable or goat hair) are particularly vulnerable to product accumulation, which hardens the fibers and reduces their blending capabilities. Synthetic brushes, while more durable, still require regular cleaning to maintain their smooth texture and color accuracy.
The frequency of cleaning depends on usage intensity. Professional makeup artists clean brushes daily, while casual users should aim for weekly cleaning of face brushes and bi-weekly for eye brushes. A proper DIY cosmetic brush cleaner makes this routine manageable and cost-effective compared to commercial alternatives that often cost $15-30 per bottle.
Essential Ingredients for DIY Brush Cleaners
Creating an effective brush cleaner requires understanding each ingredient’s function. Here are the core components used by professionals:
- Castile Soap: A plant-based, gentle cleanser that effectively removes makeup without stripping bristle oils. It’s ideal for both natural and synthetic brushes. Look for unscented varieties to avoid irritation when brushes contact skin.
- Baby Shampoo: Specifically formulated to be mild on delicate surfaces, baby shampoo breaks down makeup and conditions bristles simultaneously. It’s particularly effective for natural hair brushes.
- Olive Oil or Coconut Oil: These conditioning agents restore moisture to bristles after cleaning. They prevent brittleness and maintain the brush’s original texture. Coconut oil also has antimicrobial properties.
- Distilled Water: Essential for diluting cleansing agents and rinsing. Tap water contains minerals that can leave residue on bristles.
- Apple Cider Vinegar: A natural antimicrobial agent that kills bacteria and dissolves stubborn product buildup. Its acidity helps break down silicone-based products.
- Baking Soda: A mild abrasive that removes caked-on makeup without scratching bristles. It also neutralizes odors and balances pH.
- Essential Oils (Optional): Tea tree oil, lavender, or lemon oil add antimicrobial benefits and pleasant fragrance. Use sparingly—only 1-2 drops per batch.
For those with sensitive skin, understanding these ingredient interactions is crucial, as brush residue can transfer to your skin.
Simple Recipe: Basic Brush Cleaner Solution
This foundational recipe works for most brush types and requires minimal ingredients:
Ingredients:
- 1 cup distilled water
- 1 tablespoon castile soap or baby shampoo
- 1 tablespoon olive oil
- 1 teaspoon apple cider vinegar
Instructions:
- Pour distilled water into a clean glass container or spray bottle
- Add castile soap or baby shampoo
- Mix in olive oil—it will initially separate but will emulsify as you use it
- Add apple cider vinegar for antimicrobial benefits
- Shake well before each use (the solution naturally separates)
- Store in a cool, dark place away from direct sunlight
This solution remains effective for 2-3 weeks. If you notice cloudiness or separation that doesn’t remix, discard and prepare fresh. The shelf life depends on whether you use preservatives; for extended storage, add 1-2 drops of vitamin E oil or rosemary extract as a natural preservative.
Advanced Formulations by Brush Type
For Foundation and Powder Brushes (Dense Bristles)
These brushes accumulate heavy product buildup and require stronger cleaning solutions:
- 2 tablespoons baby shampoo
- 1 tablespoon coconut oil
- 2 teaspoons baking soda
- 1 cup warm distilled water
- 3 drops tea tree essential oil
The baking soda acts as a gentle scrub, while tea tree oil provides antimicrobial action. This formula is particularly effective for foundation brushes that collect silicone-based product residue.
For Delicate Eye and Blending Brushes
These require gentler formulations to prevent bristle damage:
- 1 cup distilled water
- 1 tablespoon castile soap
- ½ tablespoon jojoba oil
- 1 teaspoon apple cider vinegar
Jojoba oil closely mimics skin’s natural sebum, making it ideal for delicate bristles. This solution is also suitable if you have naturally dry or sensitive skin, as it won’t over-condition bristles.
For Brushes Used with Cream Products
Cream makeup, highlighter, and bronzer brushes need solutions that break down oils:
- 1 cup distilled water
- 1.5 tablespoons castile soap
- 1 tablespoon olive oil
- 2 teaspoons apple cider vinegar
- ½ teaspoon baking soda
The increased soap concentration cuts through cream products while the baking soda helps dissolve stubborn residue without requiring aggressive scrubbing.
Step-by-Step Cleaning Process
Daily Spot Cleaning (Quick Method)
For makeup artists or those who use brushes multiple times daily:
- Pour your DIY brush cleaner solution into a small cup or brush cleaner pot
- Swirl the brush in the solution for 10-15 seconds
- Wipe bristles on a clean microfiber cloth or paper towel
- Repeat until the cloth shows no color transfer
- Reshape the brush tip and place bristle-side up to air dry
Weekly Deep Cleaning (Thorough Method)
- Prepare your workspace: Use a sink with a plug or a large bowl. Lay out a clean towel and several microfiber cloths.
- Wet the bristles: Hold the brush under lukewarm (not hot) running water, angling bristles downward. Never submerge the ferrule (metal part), as water can damage the glue binding bristles.
- Apply cleanser: Pour your DIY solution into a shallow bowl or directly onto a cleansing mat. If using a mat, wet it slightly first.
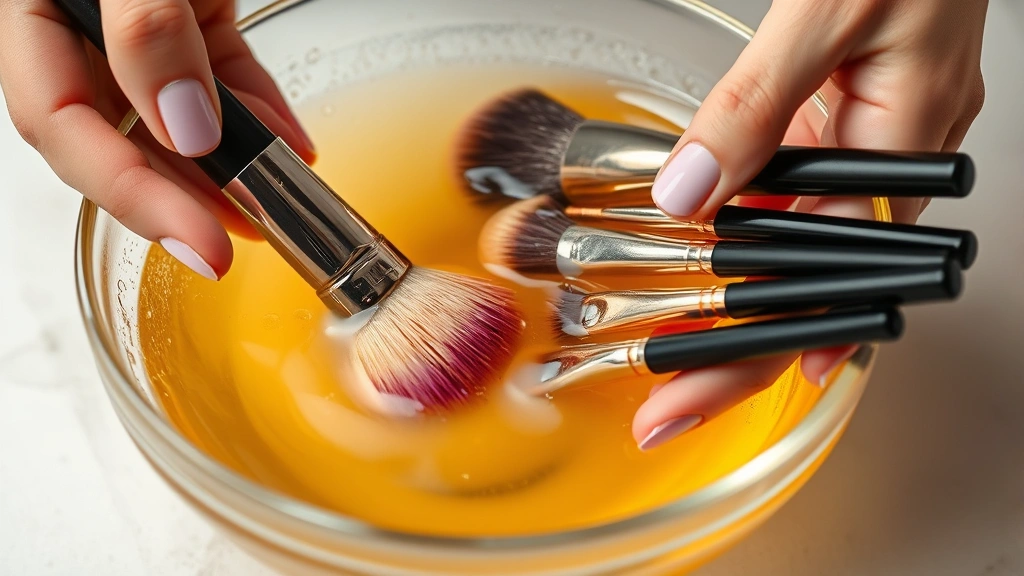
- Swirl and massage: Gently swirl the brush in the solution, working the cleanser into the bristles. For stubborn residue, use a circular massaging motion on the cleansing mat for 20-30 seconds.
- Rinse thoroughly: Rinse under lukewarm water until the water runs clear. This may require 3-5 rinses for heavily soiled brushes.
- Condition: Apply a small amount of your DIY conditioner (a few drops of the oil component) to the bristles and massage gently.
- Final rinse: Rinse once more with cool water to remove excess conditioner.
- Remove excess moisture: Gently squeeze (don’t wring) the bristles with a clean cloth, working from ferrule to tip.
- Reshape: While still damp, reshape the brush to its original form using your fingers.
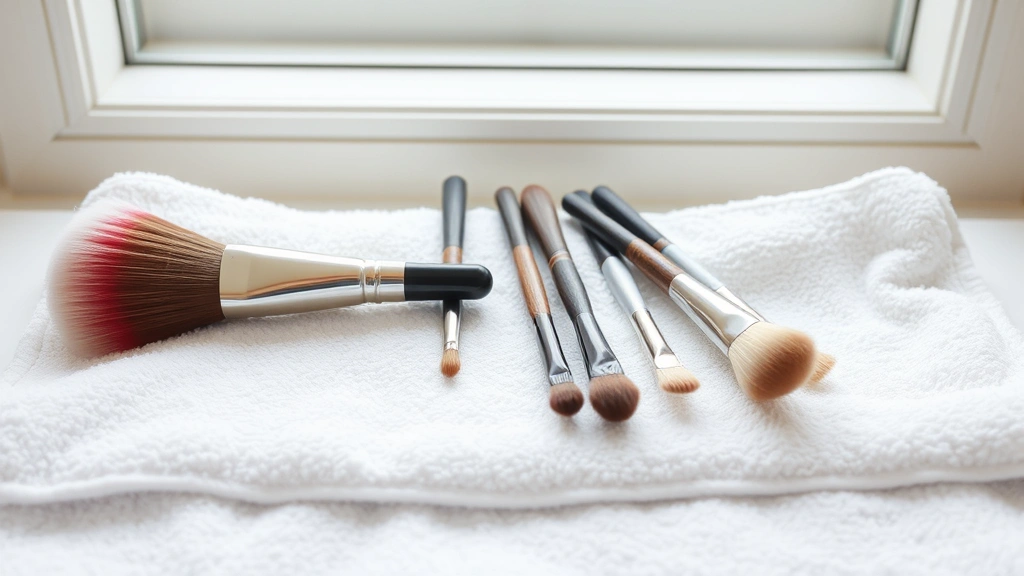
- Dry: Place brush horizontally on a clean towel or hang bristle-side down using a drying rack.
Drying and Storage Tips
Proper drying is critical to prevent mildew, mold, and bristle damage. Never stand brushes upright while wet, as water pools in the ferrule and deteriorates the bristle binding. Instead, use these drying methods:
Horizontal Drying: Lay brushes flat on a clean, absorbent towel. Rotate every 2-3 hours to ensure even drying. This method takes 24-48 hours but is gentlest on bristles.
Angled Drying: Use a brush drying rack that suspends brushes at a slight downward angle. This allows water to drip away from the ferrule while air circulates around bristles. These racks cost $10-20 but are worthwhile investments for serious brush collections.
Hair Dryer Method: On the lowest heat and speed setting, dry brushes for 5-10 minutes. Keep the dryer 12 inches away to prevent heat damage. This accelerates drying but should only be used occasionally.
Storage Recommendations:
- Store cleaned, fully dry brushes in a brush holder, cup, or drawer organizer with bristles facing up
- Avoid storing in humid bathrooms; choose a cool, dry bedroom drawer instead
- Keep brushes away from direct sunlight, which degrades natural bristles
- Don’t store brushes in closed containers while damp—this promotes mold growth
- Separate brushes with bristles facing different directions to prevent bristle matting
If you notice mold or mildew despite proper cleaning, soak brushes in a solution of 1 part white vinegar to 3 parts water for 30 minutes, then clean thoroughly and dry completely.
Common Mistakes to Avoid
Using Hot Water
High temperatures damage natural hair bristles, causing them to become brittle and frizzy. They also accelerate the breakdown of the glue holding bristles in the ferrule. Always use lukewarm water (around 95-100°F).
Submerging the Ferrule
Water seeping into the ferrule loosens bristles and causes them to shed. Keep the ferrule completely dry by angling brushes downward while cleaning and rinsing.
Using Harsh Soaps
Dish soap, body soap, and antibacterial soaps are too strong for delicate bristles. They strip natural oils and cause brittleness. Stick to gentle, plant-based formulations.
Wringing or Twisting Bristles
Aggressive squeezing damages bristle structure and can permanently bend them. Always squeeze gently, working from ferrule to tip.
Storing Wet Brushes Upright
This causes water to pool in the ferrule and promotes mold growth. Always dry brushes horizontally or at a downward angle.
Neglecting Ferrule Cleaning
Product buildup accumulates around the ferrule base, which is difficult to remove once hardened. Clean this area weekly with a soft cloth to prevent accumulation.
Skipping the Conditioning Step
While cleansing is essential, conditioning is equally important. Skipping oil application leaves bristles dry and prone to breakage. Even synthetic brushes benefit from light conditioning.
For professional guidance on brush maintenance specific to cosmetic procedures, consult resources from the Society of Cosmetic Chemists, which provides standards for cosmetic tool sanitation.
FAQ
How often should I clean my makeup brushes?
Daily use warrants daily spot cleaning and weekly deep cleaning. If you use brushes occasionally (2-3 times weekly), weekly deep cleaning is sufficient. Professional makeup artists should clean brushes daily or between each client application.
Can I use my DIY brush cleaner on all brush types?
The basic recipe works for most brushes, but dense foundation brushes benefit from stronger formulations with baking soda. Delicate eye brushes need gentler solutions. Refer to the advanced formulations section for specific brush types.
Is baby shampoo better than castile soap?
Both are effective; baby shampoo is slightly gentler and includes conditioning agents, making it better for natural bristles. Castile soap is more economical and works equally well for synthetic brushes. Choose based on your brush type and budget.
How long does homemade brush cleaner last?
Without preservatives, DIY solutions remain effective for 2-3 weeks when stored in a cool, dark place. Adding vitamin E oil or rosemary extract extends shelf life to 4-6 weeks. Always discard if you notice cloudiness, odor, or separation that doesn’t remix.
Can I use tap water instead of distilled water?
Tap water contains minerals that leave residue on bristles, affecting brush performance and appearance. Distilled water is inexpensive ($1-2 per gallon) and ensures optimal results. If distilled water is unavailable, filtered water is an acceptable alternative.
What if my brushes still have product buildup after cleaning?
Soak brushes in your DIY cosmetic brush cleaner for 15-20 minutes before scrubbing on a cleansing mat. For severe buildup, increase baking soda concentration or use a soft-bristled toothbrush to gently scrub the brush head. Never use stiff brushes or aggressive tools.
Are natural or synthetic brushes easier to clean?
Synthetic brushes are generally more durable and easier to clean due to their non-porous structure. Natural hair brushes require gentler handling but hold product more effectively. Both benefit from the same cleaning solutions, though natural bristles may need additional conditioning.
Can I use my DIY brush cleaner on beauty blenders?
Yes, the same solution works for beauty blenders and sponges. Soak them for 5-10 minutes, gently massage the cleaner into the sponge, rinse thoroughly, and air dry. Beauty blenders should be replaced every 3-6 months regardless of cleanliness.
Is apple cider vinegar necessary in the formula?
Apple cider vinegar adds antimicrobial benefits and helps dissolve silicone-based products, but it’s not essential. If you dislike the smell, omit it and increase castile soap by ½ tablespoon. The cleaner will still be effective.