Perfect Your Brows: Makeup Artist Tips for Flawless Cosmetic Brows
Your eyebrows frame your entire face, and mastering the art of cosmetic brows can transform your makeup application from amateur to professional-level. Whether you’re working with sparse brows, over-plucked arches, or simply want to enhance your natural shape, understanding the techniques that makeup artists use is essential. The right approach to brow cosmetics combines proper product selection, application technique, and skin preparation to create results that look natural yet polished.
Cosmetic brows have evolved significantly over the past decade. Gone are the days of harsh, overly-drawn arches that look painted on. Today’s makeup artist philosophy emphasizes working with your natural brow bone structure, enhancing what you already have, and using products that complement your skin tone and undertones. This comprehensive guide will walk you through everything professional makeup artists know about creating perfect cosmetic brows, from selecting the right products to mastering application techniques that last all day.
Understanding Your Brow Bone Structure
Before applying any cosmetic products, makeup artists always assess the natural bone structure beneath the brow. Your brow bone—the area of your forehead directly above your eye socket—determines the shape and positioning of your ideal brow. Understanding this anatomy is crucial because it allows you to work with your face rather than against it, creating a result that appears naturally enhanced rather than artificial.
The ideal brow typically has three key points: the head (inner part near the nose), the arch (the highest point), and the tail (the outer point). Professional makeup artists locate these points using a simple technique: hold a pencil or brush vertically against your nose to find where the head should start. Angle the pencil from the corner of your nose through the outer corner of your iris to locate where the arch should peak. Finally, angle the pencil from the corner of your nose through the outer corner of your eye to determine where the tail should end.
Your bone structure also influences brow thickness. If you have a high, prominent brow bone, you can carry thicker brows beautifully. Those with a lower brow bone may find that slightly thinner, more defined brows create better balance. This is why cookie-cutter brow trends don’t work for everyone—your individual anatomy should guide your cosmetic brow decisions.
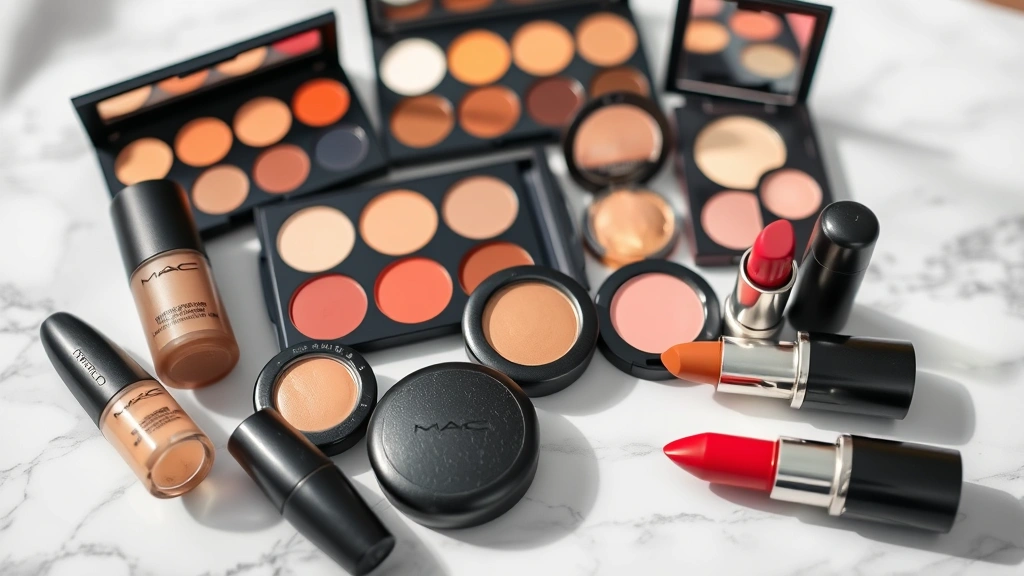
Choosing the Right Brow Products
The cosmetics market offers numerous brow products, and choosing the right ones depends on your hair density, skin type, and desired finish. Makeup artists typically work with several product categories, each serving a specific purpose in creating flawless cosmetic brows.
Brow Pencils and Micro-Liners: These are ideal for creating precise, hair-like strokes, especially for those with sparse brows or gaps. The fine tip allows you to mimic individual brow hairs, creating a natural appearance. Makeup artists favor pencils with slightly waxy formulas that adhere well to skin without tugging.
Brow Powders and Pomades: Powders work beautifully for filling in brows with a softer, more natural appearance. They’re excellent for those with sensitive skin around the brows. Pomades offer more precision and longevity than powders and are ideal for creating bold, defined brows. When selecting a pomade, makeup artists look for creamy formulas that don’t become too dry or flaky throughout the day.
Brow Gels and Tints: These products serve dual purposes—they tint the brows while setting them in place. They’re perfect for those who want to enhance their natural brows without heavy coverage. Tinted gels work particularly well when your natural brow color is close to your desired shade but needs slight enhancement.
For optimal results, many professional makeup artists use a combination approach. Start with a brow primer or base product, apply a powder or pomade for coverage and shape, then set everything with a setting spray designed for cosmetics. This layered approach ensures your cosmetic brows remain flawless from morning through evening.

Color Selection for Cosmetic Brows
Choosing the correct brow color is more nuanced than simply matching your hair color. Makeup artists consider your skin undertones, hair color, and the overall makeup look you’re creating. This is where understanding your facial features and their harmonious balance becomes important.
For Cool Undertones: If you have cool undertones (pink, red, or blue undertones in your skin), your brows should lean toward ashy, cooler tones. Ash brown, cool taupe, or graphite shades work beautifully. These colors complement cool-toned hair like ash blonde, platinum, or cool brunette.
For Warm Undertones: Warm undertones call for warm brow colors. Think warm browns, golden taupes, and caramel shades. These complement warm hair tones like golden blonde, warm brunette, or rich red.
For Neutral Undertones: Lucky individuals with neutral undertones can wear a wider range of brow colors. Warm and cool tones both work, so focus on complementing your hair color and creating the mood you want for your makeup look.
General Rules Makeup Artists Follow: Your brows should typically be one to two shades darker than your hair color, but not so dark that they appear harsh. For those with very light or very dark hair, aim for a medium tone that creates definition without looking artificial. Always test brow products on a small section first, as brow color can appear darker on skin than it appears in the container.
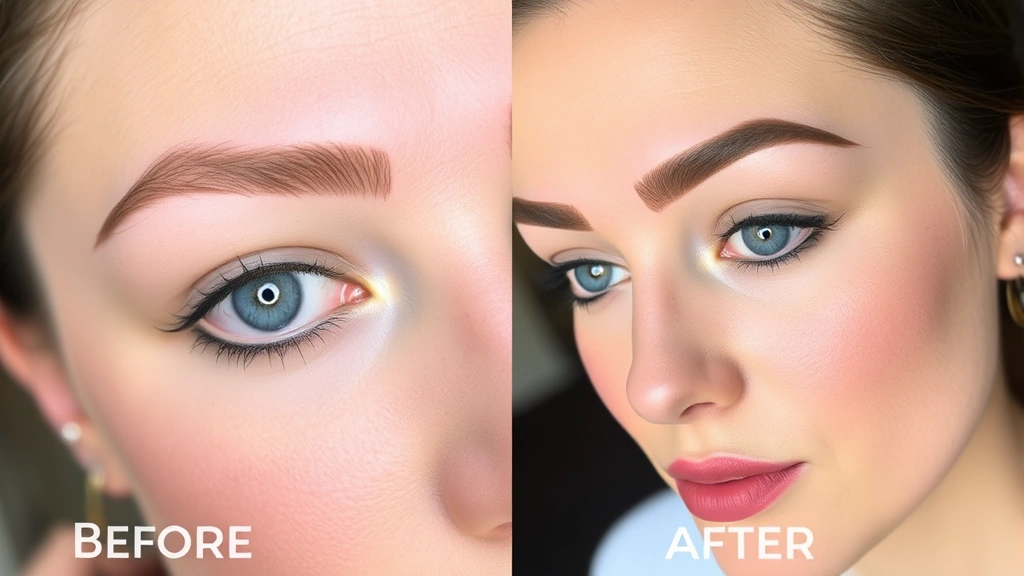
Step-by-Step Application Techniques
Professional makeup artists follow a methodical approach to brow application. Here’s the exact technique they use to create flawless cosmetic brows:
Step 1: Prepare the Canvas
Begin by ensuring your brow area is clean and dry. If you’re dealing with dark circles under eyes that extend near the brows, address those first with a concealer. Apply a brow primer or eyeshadow primer to the brow area. This creates a smooth base and helps your brow products adhere better throughout the day.
Step 2: Map Your Brows
Using a light hand and a thin brush, lightly map out the shape of your brows. This temporary guide helps you stay within your natural brow shape and ensures both brows are symmetrical. Use light strokes—you want guidance, not a permanent outline.
Step 3: Fill in Sparse Areas
Using your chosen brow product (powder, pomade, or pencil), fill in any sparse areas with short, feathery strokes that mimic hair direction. Work from the inner brow outward, following the natural growth pattern of your hair. Makeup artists emphasize that less is more—you can always add more product, but removing excess is difficult.
Step 4: Define the Arch
The arch is where you create the most definition. Apply slightly more product here to create shape and lift. Use upward strokes to emphasize the arch point. This is what creates that polished, professional appearance.
Step 5: Soften the Tail
The tail of your brow should taper and soften gradually. Avoid creating a harsh point. Use lighter pressure and shorter strokes as you move toward the tail. The tail should appear slightly thinner and more delicate than the arch.
Step 6: Blend and Refine
Using a clean, fluffy brush or spoolie, blend the product slightly to soften any harsh lines while maintaining the overall shape. This creates a more natural, blended appearance rather than a drawn-on look.
Step 7: Set the Brows
Apply a brow gel or setting product to lock everything in place. This is especially important if you’re using powder products, which can shift throughout the day. A quality setting spray applied to the brow area adds extra longevity.
Skin Preparation and Primer
Proper skin preparation is the foundation of any cosmetic application, and brows are no exception. The skin around your eyes and brows is delicate and prone to oiliness or dryness, both of which affect how brow products perform.
Cleansing and Hydration: Start with clean, hydrated skin. Makeup artists recommend properly soothing and hydrating irritated skin around the eye area before applying any cosmetics. If your skin is dehydrated, brow products may appear patchy or flaky. If your skin is oily, products may slide around.
Primer Selection: Choose a primer suited to your skin type. Oily skin benefits from silicone-based primers that create a smooth, non-slip surface. Dry skin benefits from hydrating primers that maintain moisture while providing adhesion. Some makeup artists use a specialized brow primer, while others use their regular eyeshadow primer with great success.
Application Technique: Apply primer with a light hand, using your finger or a small brush. The goal is a thin, even layer that creates a base for your brow products without adding bulk. Wait 30-60 seconds for the primer to set before applying brow color.
Making Brows Last Longer
One of the biggest concerns with cosmetic brows is longevity. You want your brows to look fresh and polished from morning through evening, whether you’re working, attending events, or dealing with humidity and perspiration.
Product Combination Strategy: Makeup artists layer products strategically for maximum wear. Start with a brow primer, add your primary brow color (powder or pomade), then set with a gel or spray. This three-step approach significantly extends wear time compared to using a single product.
Waterproof Formulas: If longevity is your primary concern, opt for waterproof brow products. These formulas resist moisture, oil, and friction better than standard formulas. However, note that waterproof products can be more difficult to remove, so ensure you have an effective makeup remover.
Brow Maintenance Throughout the Day: Keep a small spoolie and setting gel in your purse or cosmetic makeup organizer for touch-ups. A quick brush-through and light application of gel can refresh your brows mid-day without requiring a complete reapplication.
Avoiding Common Mistakes: Don’t apply brow products to damp skin, as moisture prevents proper adhesion. Avoid touching or rubbing your brows throughout the day. Be cautious with sunscreen and moisturizers applied near the brows, as these can cause products to shift. Apply these products before brow cosmetics, allowing them to fully set.
Troubleshooting Common Brow Problems
Uneven Brows: If your brows are naturally uneven, use your brow products to create visual balance. You might fill in the sparse side more heavily or adjust the arch position slightly on each brow. Remember that perfect symmetry isn’t natural—slight differences actually look more authentic.
Brows That Look Too Dark: If you’ve applied too much product, use a clean spoolie to brush through and lighten the appearance. For future applications, use less product and build gradually. It’s easier to add more than to remove excess.
Patchy or Streaky Appearance: This usually indicates either inadequate primer, application in the wrong direction, or using a product that doesn’t match your skin undertone well. Ensure you’re applying products in the direction of hair growth, use a primer, and consider trying a different shade or formula.
Brows That Don’t Hold Shape: If your brows won’t stay in place, you likely need a stronger hold product. Upgrade to a pomade if you’re using powder, or try a waterproof formula. Ensure you’re applying setting gel or spray after your brow color.
Irritation or Sensitivity: The eye area is sensitive, so if you experience irritation, consider switching to hypoallergenic formulas or those specifically designed for sensitive skin. Avoid products with fragrances or essential oils if you have reactive skin. Always remove brow products thoroughly at night.
FAQ
What’s the best brow product for beginners?
A brow pencil is typically the best starting point for beginners. It offers precision, is easy to control, and allows you to build product gradually. Once you’re comfortable, you can experiment with powders, pomades, and gels.
How often should I replace my brow products?
Brow pencils typically last 6-12 months depending on use. Powders and pomades usually last 12-24 months. Always replace products if you notice changes in texture, color, or if they’re no longer performing well. Store products in a cosmetic makeup organiser away from direct heat and sunlight to extend shelf life.
Can I use regular eyeshadow as a brow product?
While you can technically use eyeshadow for brows, dedicated brow products are formulated differently. They’re typically more pigmented, have better staying power, and are designed for the unique demands of brow application. Eyeshadow may not adhere as well or last as long.
Should my brows match my hair color exactly?
Not necessarily. Your brows should complement your hair color while considering your skin undertones. They’re typically one to two shades darker than your hair for definition. Some makeup artists intentionally use brow colors slightly different from hair color to create specific moods or effects.
How can I make sparse brows look fuller?
Use a combination of products and techniques: apply brow primer for better adhesion, use a pencil to create hair-like strokes in sparse areas, fill in with powder for coverage, and set with gel. Consider consulting a professional makeup artist for personalized techniques suited to your specific brow situation.
What’s the difference between brow pomade and brow powder?
Pomades offer more precision and longer wear but can appear heavier. Powders create a softer, more natural appearance and work well for sensitive skin but may not last as long. Many makeup artists use both—powder for base coverage and pomade for definition and precision.
Can I use concealer for brow shaping?
Yes! Concealer is an excellent tool for brow shaping. Apply concealer lighter than your skin tone just above and below your brow outline to create definition and make your brows appear more sculpted. This technique is a professional makeup artist secret for achieving polished-looking cosmetic brows.