DIY Drawstring Cosmetic Bag: Expert Tutorial Inside
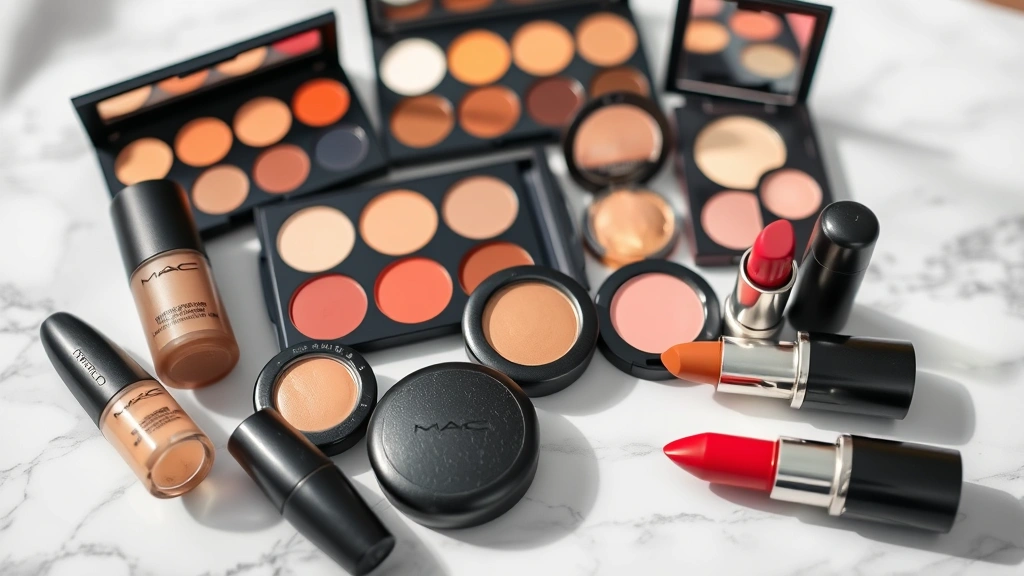
Creating your own drawstring cosmetic bag is more than just a fun craft project—it’s a practical solution for organizing your skincare and makeup collection while keeping your products protected during travel. Whether you’re storing skincare products with hyaluronic acid or your daily makeup essentials, a well-constructed drawstring bag ensures your items remain organized, accessible, and safe from spills.
This comprehensive guide walks you through every step of crafting a professional-quality drawstring cosmetic bag at home. From selecting the right materials to mastering advanced construction techniques, you’ll learn exactly how to create a durable, aesthetically pleasing bag that rivals commercial options. We’ll explore fabric choices, waterproofing methods, and organizational features that make your DIY project both functional and beautiful.
Why Make Your Own Drawstring Cosmetic Bag
A DIY drawstring cosmetic bag offers numerous advantages over store-bought alternatives. First, you gain complete control over the size, design, and internal layout. Commercial bags often come with fixed compartments that don’t accommodate your specific products. When you create your own, you can customize the dimensions to fit exactly what you need—whether that’s storing treatments for dark circles under eyes or a full skincare regimen.
Cost-effectiveness is another significant benefit. Quality drawstring cosmetic bags can retail for $25 to $60, while your DIY version typically costs $8 to $15 in materials. Additionally, handmade bags provide a personalized touch that reflects your style and preferences. You’re not limited to standard colors or patterns—you can choose fabrics that complement your aesthetic while meeting functional requirements.
Environmental consciousness plays a role too. By creating your own bag, you reduce reliance on mass-produced items and can select eco-friendly, sustainable fabrics. Many crafters prefer organic cotton, linen, or recycled materials that align with their values while delivering superior performance.
Essential Materials and Tools
Before beginning your project, gather all necessary materials and tools. Having everything organized prevents interruptions and ensures a smoother crafting experience.
Materials Needed:
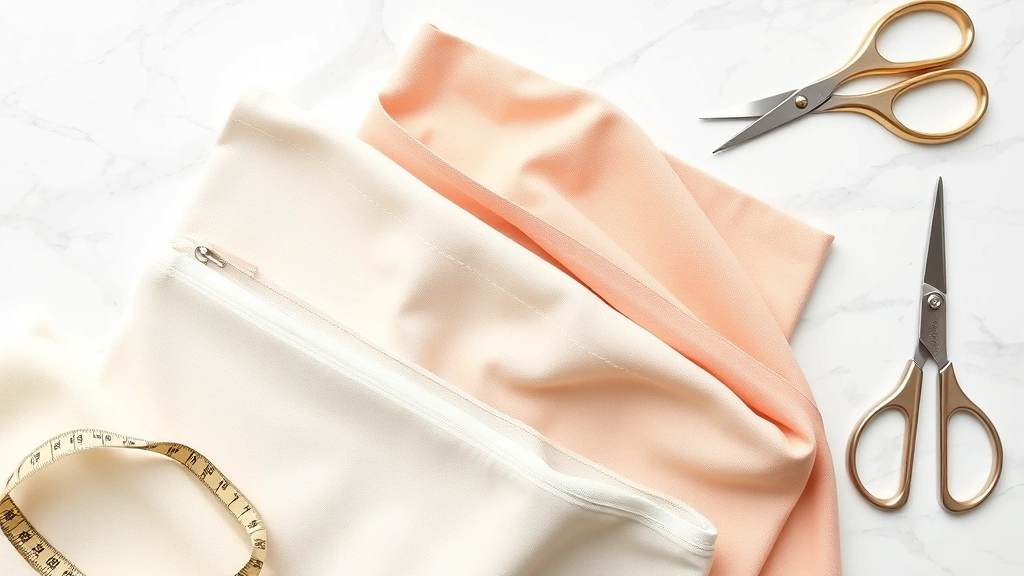
- Outer fabric (cotton, canvas, or specialized cosmetic bag fabric): 1 yard
- Inner lining fabric (cotton or waterproof material): 1 yard
- Drawstring cord or ribbon: 2-3 yards
- Elastic bands (optional): ¼-inch width
- Thread (matching colors): polyester or cotton
- Bias tape or binding (optional): for reinforced edges
- Waterproofing spray or sealant (optional)
Tools Required:
- Sewing machine with basic and zigzag stitches
- Serger machine (optional, for professional finishing)
- Rotary cutter and self-healing mat
- Measuring tape and ruler
- Pattern paper or template
- Pins, needles, and thread snips
- Iron and ironing board
- Scissors (fabric and paper)
- Chalk or fabric pencil for marking
Quality tools make a significant difference in your final product. A reliable sewing machine is essential—it doesn’t need to be expensive, but it should handle multiple fabric layers without skipping stitches.
Choosing the Perfect Fabric
Fabric selection determines your bag’s durability, aesthetics, and functionality. Each material offers distinct advantages depending on your needs.
Cotton Canvas: This heavyweight cotton fabric provides excellent structure and durability. It resists tearing and maintains its shape even when fully loaded with cosmetics. Canvas works beautifully for everyday bags and accepts dyes and prints well. However, it’s not inherently water-resistant, requiring additional waterproofing treatment.
Waterproof Laminated Cotton: Combining cotton’s softness with waterproof coating, laminated cotton prevents spills from damaging the exterior. It’s ideal if you’re storing liquid foundations, serums, or hydrating skincare products. The lamination can be slightly stiff initially but softens with use.
Linen: Breathable and aesthetically sophisticated, linen offers a natural, elegant appearance. It’s lightweight and comfortable to carry. However, linen wrinkles easily and requires careful handling. It’s best paired with waterproof inner linings for cosmetic storage.
Neoprene: This synthetic material provides excellent water resistance and cushioning. Neoprene protects delicate items and maintains structure. It’s heavier than other options and may feel less luxurious, but it’s practically indestructible.
Specialty Cosmetic Bag Fabric: Some retailers offer fabrics specifically designed for cosmetic bags, featuring built-in water resistance and antimicrobial properties. These premium options cost more but deliver superior performance and longevity.
Lining Fabric Selection:
Your inner lining is equally important as the outer fabric. Waterproof lining materials prevent product leakage from contaminating your bag’s exterior and contents. Popular choices include:
- Waterproof cotton: Breathable yet protective
- Vinyl: Highly water-resistant and easy to clean
- Laminated cotton: Combines durability with water resistance
- Minky: Soft and protective, ideal for delicate items
Consider your storage needs when selecting linings. If you frequently store liquid products, vinyl or laminated cotton provides maximum protection. For dry products like powders and brushes, a standard cotton lining suffices.
Step-by-Step Construction Guide
Now that you’ve selected materials, let’s build your drawstring cosmetic bag. This detailed process creates a professional-quality finished product.
Step 1: Create Your Pattern
Begin by determining your desired dimensions. A standard cosmetic bag measures 8 inches wide × 6 inches tall × 4 inches deep. However, adjust these measurements based on your specific needs. On pattern paper, draw your bag shape, adding ½-inch seam allowances on all sides. Create separate patterns for the outer fabric and lining.
Step 2: Cut Your Fabric Pieces
Using your rotary cutter and mat, carefully cut two pieces of outer fabric and two pieces of lining fabric according to your pattern. Precision matters here—uneven cuts result in misaligned seams. Mark the top edge where your drawstring channel will sit using a fabric pencil.
Step 3: Prepare the Outer Fabric
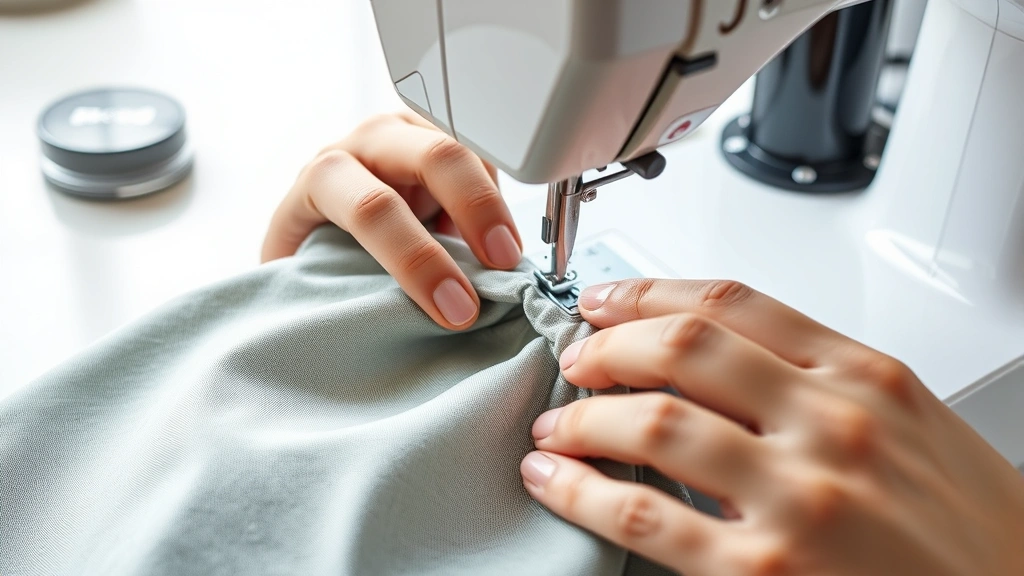
Place your two outer fabric pieces with right sides together. Using your sewing machine set to a straight stitch with matching thread, sew three sides, leaving the top edge open. Backstitch at the beginning and end of each seam for reinforcement. Use a ½-inch seam allowance for consistency. Press the seams open using your iron to reduce bulk.
Step 4: Construct the Lining
Repeat the same process with your lining fabric pieces. Sew three sides, leaving the top open. Press seams open. The lining will be inserted into the outer bag later, so keep it slightly smaller if desired—trim ¼ inch from the sides if your lining fits too snugly.
Step 5: Create the Drawstring Channel
This step is crucial for functionality. Fold the raw top edge of your outer fabric down ¾ inch and press. Fold again ¾ inch and press, creating a channel for your drawstring. Pin in place. Stitch close to the bottom fold, then stitch again ¼ inch higher, creating a narrow channel through which your drawstring will pass. Remove pins as you sew.
Step 6: Insert and Attach the Lining
Turn your outer bag right-side-out. Insert the lining with wrong-side-out, so the right sides face each other. The lining’s raw edges should align with the bag’s raw edges. Pin the lining to the outer bag around the top opening. Stitch around the top edge, securing the lining permanently to the outer fabric. This seam holds everything together.
Step 7: Turn and Press
Carefully turn the entire bag right-side-out through the top opening. Use a point turner or chopstick to gently push the corners out. Press the entire top edge flat with your iron, ensuring the lining sits perfectly inside the bag.
Step 8: Topstitch for Reinforcement
A topstitch around the top edge adds durability and professional appearance. Using matching thread and a straight stitch, sew ⅛ inch from the very top edge all the way around. This secures the lining and creates a neat finish.
Step 9: Insert the Drawstring
Using a safety pin or drawstring threader, insert your cord through the channel you created. Start at one side and work it through the entire channel. Tie knots at both ends to prevent fraying and create secure handles. You can also add beads or toggles to the drawstring ends for decorative appeal and easier handling.
Step 10: Final Inspection and Finishing
Turn your bag inside-out and inspect all seams. Trim any loose threads. Check that the drawstring moves smoothly and that the bag holds its shape. If you’re using a serger, consider running it along the interior seams for a professional, finished look.
Waterproofing and Protection Methods
Protecting your cosmetics from spills and moisture damage requires effective waterproofing strategies. Since cosmetic bags often store liquid products, implementing protection is essential.
Fabric Waterproofing Spray:
Apply commercial waterproofing spray to your finished outer fabric following manufacturer instructions. These sprays create an invisible barrier that repels water while maintaining breathability. Use in a well-ventilated area and apply multiple thin coats for best results. Popular options include those from specialty textile manufacturers that guarantee cosmetic-safe formulations.
Wax Coating Method:
For a natural alternative, apply food-grade beeswax to your outer fabric. Heat your iron to medium temperature and place a thin layer of beeswax between parchment paper and your fabric. Iron gently, allowing the wax to penetrate the fibers. This method creates excellent water resistance and a pleasant natural scent.
Laminating Your Fabric:
If you didn’t select pre-laminated fabric, you can laminate finished pieces using heat-seal laminating sheets or iron-on vinyl. This adds a protective layer that prevents water penetration. However, lamination reduces fabric breathability, which may trap moisture if your bag isn’t aired regularly.
Interior Vinyl Pouch:
For maximum protection of liquid products, insert a small waterproof vinyl pouch inside your drawstring bag. Store all liquid items in this pouch, preventing spills from affecting other products or the bag’s interior. This is especially important when traveling or storing items for extended periods.
Silica Packets:
Include food-grade silica gel packets inside your bag to absorb excess moisture. These packets prevent mold growth and maintain a dry environment for your cosmetics. Replace packets monthly or when they become saturated.
Advanced Organizational Features
Elevate your drawstring cosmetic bag with organizational elements that maximize functionality. These features help you locate products quickly and maintain order.
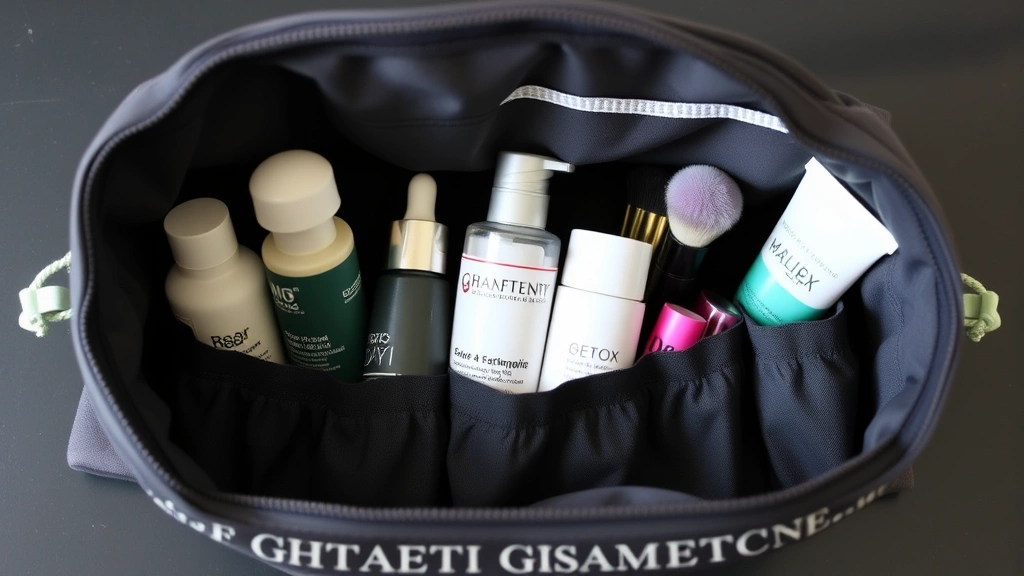
Interior Pockets:
Before closing your bag, attach small pockets to the lining for storing small items like lip balms, bobby pins, or contact lens cases. Cut pocket pieces from your lining fabric, fold and press, then stitch to the interior lining before inserting it into the outer bag. Position pockets strategically on opposite sides to distribute weight evenly.
Elastic Band Dividers:
Sew elastic bands horizontally across the interior, creating compartments for different product types. Makeup brushes, skincare bottles, and tools can each have designated sections. Use ¼-inch elastic for durability and sew it securely to both sides of the bag.
Hanging Loop:
Add a small fabric loop at the top edge for hanging your bag in a bathroom or on a travel hook. Cut a 2-inch wide strip of your outer fabric, fold lengthwise with right sides together, and sew. Turn right-side-out and attach to the side seam before final assembly. This feature is invaluable for storage and accessibility.
Zippered Compartment:
For premium functionality, incorporate a small zippered pocket for storing medications, vitamins, or particularly valuable items. Install a zipper into the lining before inserting it into the outer bag. This requires intermediate sewing skills but dramatically increases organization.
Magnetic Closure Tab:
Instead of relying solely on drawstring closure, add a magnetic closure tab at the top. Cut a rectangular piece of your outer fabric, insert a thin magnetic strip, and fold and sew it shut. Attach to one side of the opening with a corresponding magnetic strip on the opposite side. This provides quick, secure closure while the drawstring remains open.
Finishing Touches and Customization
Transform your functional bag into a personalized accessory that reflects your style. These finishing touches elevate your DIY project from practical to professional.
Decorative Trims and Binding:
Apply bias tape, ribbon, or decorative binding along the top edge and side seams. This covers raw edges while adding visual interest. Choose colors and patterns that complement your outer fabric. Lace trim creates an elegant aesthetic, while solid-colored binding provides a clean, minimalist look.
Embroidery and Personalization:
Embroider your initials, a meaningful date, or decorative motifs onto the outer fabric. Use embroidery floss in contrasting colors for maximum visibility. Consider your personal cosmetic treatment preferences when choosing designs—minimalist patterns suit clinical aesthetics, while florals and nature themes add warmth.
Fabric Paint and Dyes:
Customize your outer fabric before assembly using fabric paint or dyes. Create geometric patterns, ombre effects, or personalized designs. Ensure all paint or dye is fully cured before sewing to prevent staining or color transfer.
Appliqué Details:
Cut shapes from contrasting fabric and stitch them onto your outer bag. Floral appliqués, geometric shapes, or meaningful symbols add dimension and personality. Use a zigzag stitch around the edges for a polished finish.
Button and Toggle Accents:
Sew decorative buttons along the side seams or near the top edge. These serve no functional purpose but enhance visual appeal. Similarly, add fabric toggles to your drawstring for easier handling and aesthetic enhancement.
Label Creation:
Design and attach a custom label inside your bag. Include your name, creation date, and care instructions. This transforms your project into something gift-worthy and memorable. Use a label-making printer for professional results.
Maintenance and Care Tips
Proper maintenance ensures your drawstring cosmetic bag remains functional and beautiful for years. These care practices protect your investment and maintain hygiene standards essential for cosmetic storage.
Regular Cleaning:
Empty your bag completely at least monthly. Wipe the interior with a damp cloth to remove product residue and dust. For the exterior, use a soft brush to remove debris. If your outer fabric is washable, hand wash in cool water with mild soap, then air dry completely before refilling.
Spill Management:
Address spills immediately to prevent staining and bacterial growth. Blot excess liquid with a clean cloth, then wipe with a damp cloth. For stubborn stains, use a mixture of equal parts white vinegar and water. Avoid harsh chemicals that may damage your fabric or waterproofing treatment.
Storage Conditions:
Store your bag in a cool, dry location away from direct sunlight. Excessive heat can degrade waterproof coatings and cause fabric fading. Ensure your bag is completely dry before storing to prevent mold and mildew growth.
Odor Control:
Place a small sachet of dried lavender or activated charcoal inside your bag to absorb odors. Replace monthly. These natural deodorizers prevent musty smells without introducing harmful chemicals that could affect your skincare products.
Inspection and Repair:
Regularly inspect seams, the drawstring, and zipper (if applicable) for signs of wear. Address loose threads immediately by securing them with a needle and thread. If a seam begins separating, reinforce it with a topstitch before the damage spreads.
Waterproofing Maintenance:
Reapply waterproofing spray annually or whenever you notice water no longer beads on the surface. This maintains your bag’s protective qualities and extends its lifespan. Follow the manufacturer’s instructions carefully for best results.
Product Organization Refresh:
Every three months, remove all products and reorganize your bag. Discard expired items and clean any residual product buildup. This practice maintains hygiene and prevents cross-contamination between products. It’s especially important if you store skincare products for facial treatments alongside makeup.
FAQ
What size should my drawstring cosmetic bag be?
Standard dimensions are 8×6×4 inches, but customize based on your needs. If you carry many products, consider 10×7×5 inches. For travel, a compact 6×5×3 inch bag works well. Measure your most frequently carried items and add 1-2 inches for comfortable packing.
Can I use regular cotton fabric without waterproofing?
While possible, unprotected cotton absorbs liquid and stains easily. If using regular cotton, always line your bag with waterproof material and store liquid products in an additional protective pouch. Consider that cosmetic professionals recommend waterproof storage for all liquid and cream products.
How do I prevent my drawstring from getting tangled?
Keep drawstrings untangled by threading them through a small bead or toggle at each end. Some crafters create a separate small pouch that holds the excess cord neatly. Alternatively, coil the drawstring inside the bag rather than letting it hang loose.
What’s the best way to add pockets to an existing bag?
If your bag is already constructed, hand-sew pockets using a ladder stitch, which is nearly invisible. Cut pocket pieces, fold and press the edges, then stitch carefully to the interior lining. This method works well for adding organization after initial completion.
How often should I clean my cosmetic bag?
Clean your bag monthly or immediately after any spills. Wipe the interior weekly with a dry cloth to remove loose debris. This frequency maintains hygiene and prevents bacterial growth, which is especially important since cosmetic bags store products that contact your face and skin.
Can I make a drawstring cosmetic bag without a sewing machine?
Yes, though it requires more time and patience. Use a hand-sewing needle with a running stitch or backstitch. For durability, double your thread and make stitches close together (approximately every ¼ inch). While achievable, machine sewing creates stronger, more consistent seams.
What thread weight is best for cosmetic bags?
Use all-purpose polyester thread in weight 40 or 50. These weights provide strength without excessive bulk. Match thread color to your fabric for invisible seams, or use contrasting thread for decorative topstitching. Avoid lightweight thread that may break under the weight of filled products.
Is neoprene suitable for cosmetic bag construction?
Absolutely. Neoprene offers excellent water resistance and cushioning, protecting delicate items like glass bottles. It’s heavier and less breathable than cotton, but ideal for travel bags. Sew neoprene with a slightly slower machine speed to prevent stretching.
Can I add a rigid base to my drawstring bag?
Yes. Create a base from interfacing, cardboard, or thin plastic sheeting. Insert it after turning your bag right-side-out but before final closing. This prevents your bag from collapsing and provides structure, making it easier to locate items inside.
What’s the best drawstring material?
Cotton rope, paracord, or grosgrain ribbon all work well. Cotton rope offers a natural aesthetic, paracord provides durability for heavy use, and grosgrain ribbon adds elegance. Choose material that complements your outer fabric and can withstand repeated pulling without fraying. Ensure it’s at least ¼ inch wide for comfortable handling.